The Ultimate Guide to Easy & Chewy Homemade Funfetti Cookies: A Recipe for Joy
The moment you lay eyes on these vibrant Funfetti Cookies, you know you’re in for a treat! Speckled with an explosion of rainbow goodness, these cookies aren’t just delicious; they’re a celebration in every bite. Whether you’re a seasoned baker or just starting your culinary journey, this easy-to-follow recipe will guide you to create perfectly soft, delightfully chewy, and incredibly flavorful funfetti cookies that will bring a smile to anyone’s face. Forget the store-bought versions; homemade funfetti cookies are superior in taste, texture, and visual appeal. Our recipe delivers a buttery, sweet cookie base reminiscent of a classic chocolate chip cookie, but with the added joy of colorful sprinkles throughout, making them truly irresistible.
What are Funfetti Cookies?
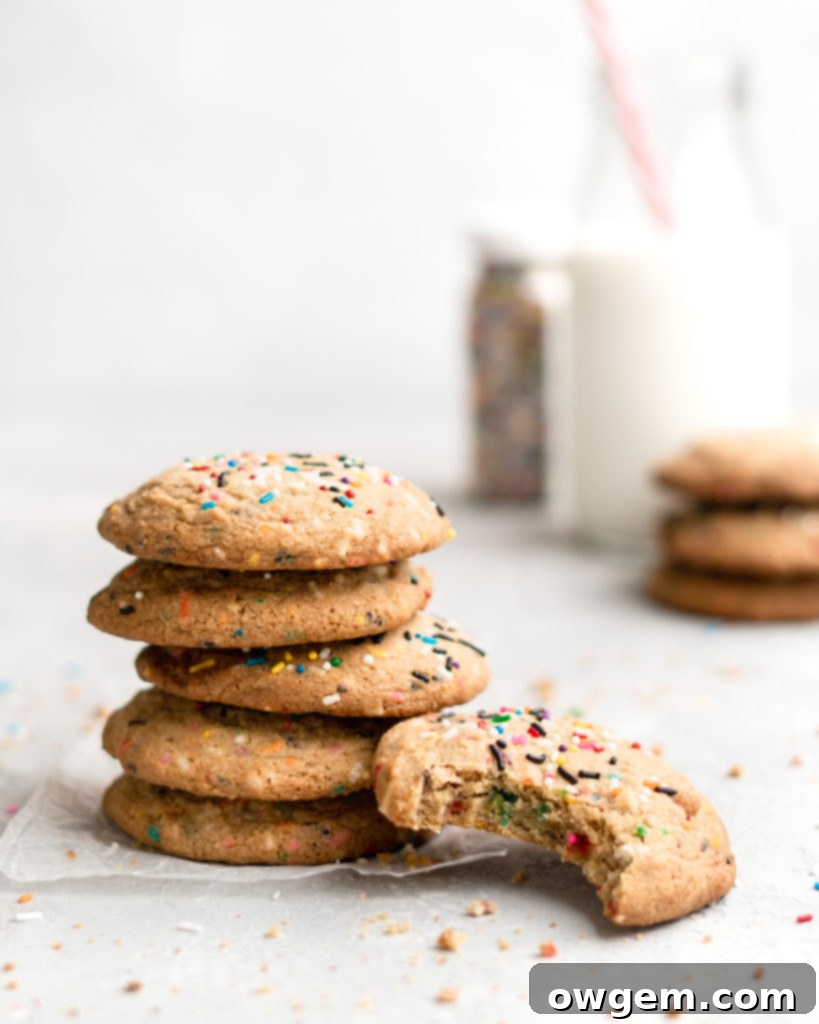
If you’ve ever enjoyed a slice of funfetti cake – that delightful white cake infused with a kaleidoscope of sprinkles – then you already have a good idea of what funfetti cookies are all about! Essentially, these cookies capture the essence of that beloved cake in a convenient, handheld form. They’re a playful twist on a traditional sugar cookie or even a simple chocolate chip cookie dough, where the chocolate chips are replaced with an abundance of colorful sprinkles. But these aren’t just any funfetti cookies. Our recipe elevates the classic by incorporating a few key ingredients and techniques to ensure maximum flavor and an unparalleled chewy texture.
Unlike many basic sugar cookie recipes that rely solely on white granulated sugar, our funfetti cookies utilize a blend of both light brown sugar and white sugar. The light brown sugar is a secret weapon, contributing not only a deeper, more nuanced molasses flavor but also adding moisture, which is crucial for achieving that coveted soft and chewy interior. This subtle flavor enhancement makes a significant difference, distinguishing these cookies from a plain sugar cookie. Furthermore, to guarantee an extra layer of tenderness and richness, we add an extra egg yolk to the dough. This additional yolk provides richness without adding excessive liquid, resulting in a perfectly tender crumb that almost melts in your mouth. The combination of these thoughtful ingredients transforms a simple sprinkle cookie into an extraordinary funfetti experience.
Ingredients Deep Dive: Crafting the Perfect Funfetti Cookie
Understanding the role of each ingredient is key to mastering any baking recipe, and funfetti cookies are no exception. Here’s a closer look at what goes into our recipe and why:
- All-Purpose Flour: The structural backbone of our cookies. We highly recommend weighing your flour (300g) rather than measuring volumetrically (about 2 cups). Why? Because scooping flour can compact it, leading to vastly different amounts and ultimately, an off-texture in your cookies. Too much flour results in dry, crumbly cookies, while too little can lead to excessive spreading.
- Baking Soda: This leavening agent reacts with acidic ingredients (like brown sugar) to produce carbon dioxide, creating tiny air bubbles that give the cookies their characteristic lift and soft texture. It’s essential for achieving that delightful chew.
- Salt: A critical flavor enhancer. Salt balances the sweetness of the sugars and brings out the buttery notes, ensuring the cookies aren’t just sweet but also rich and well-rounded in flavor.
- Unsalted Butter (Room Temperature): Butter provides richness, flavor, and helps create a tender crumb. Using unsalted butter allows you to control the total salt content. Room temperature butter is crucial for proper creaming with the sugars, creating air pockets that contribute to the cookie’s texture.
- Light Brown Sugar: As mentioned, brown sugar adds moisture, depth of flavor (molasses notes), and promotes chewiness. Its slight acidity also plays a role with the baking soda.
- White Granulated Sugar: Contributes to the overall sweetness and also helps with the crispness around the edges, balancing the chewiness from the brown sugar.
- Large Eggs & Extra Egg Yolk: Eggs act as a binder, provide structure, and add moisture. The extra egg yolk is specifically included for added richness and tenderness, making the cookies wonderfully soft without making them cake-like.
- Vanilla Extract: A foundational flavor in most sweet treats, vanilla enhances all the other flavors, giving the cookies a warm, inviting aroma and taste.
- Sprinkles: The star of the show! These vibrant little bits add color, fun, and a slight textural crunch. We’ll delve into the types of sprinkles in a dedicated section, but aim for a good quality brand that holds its color well during baking.
How to Make Funfetti Cookies: A Step-by-Step Guide
Making these funfetti cookies is a straightforward and enjoyable process, especially if you have some cookie-baking experience. Follow these steps for perfect results:
- Prepare Dry Ingredients: In a medium to large bowl, whisk together the measured flour, baking soda, and salt. Whisking ensures these ingredients are evenly distributed, which is vital for uniform leavening and seasoning. Set this bowl aside.
- Cream Butter and Sugars: In a large mixing bowl, or the bowl of a stand mixer fitted with the paddle attachment, combine the softened unsalted butter with both the light brown sugar and white granulated sugar. Beat these ingredients together on medium-high speed for about 3 minutes. The mixture should transform into a light, fluffy, and noticeably expanded texture, almost doubled in volume. This creaming process incorporates air, which is essential for a tender cookie.
- Add Wet Ingredients: In a separate small bowl, whisk together the two large eggs, the extra egg yolk, and the vanilla extract. Pour this mixture into the creamed butter and sugar. Continue to beat on high speed for another 2 minutes, making sure to periodically scrape down the sides and bottom of the bowl with a spatula. This ensures all ingredients are thoroughly combined and no pockets of unmixed batter remain.
- Incorporate Dry Ingredients: Reduce the mixer speed to low. Gradually add the whisked dry ingredients to the wet mixture, mixing until they are just combined. It’s crucial not to overmix at this stage, as overmixing can develop too much gluten, leading to tough cookies. Scrape down the sides of the bowl once more to ensure everything is incorporated without overworking the dough.
- Fold in Sprinkles: Gently add your chosen sprinkles to the dough. Using a spatula, carefully fold them into the dough until they are evenly dispersed. Over-mixing the sprinkles can cause their colors to “bleed” into the dough, especially with certain types of sprinkles, dulling the vibrant funfetti effect.
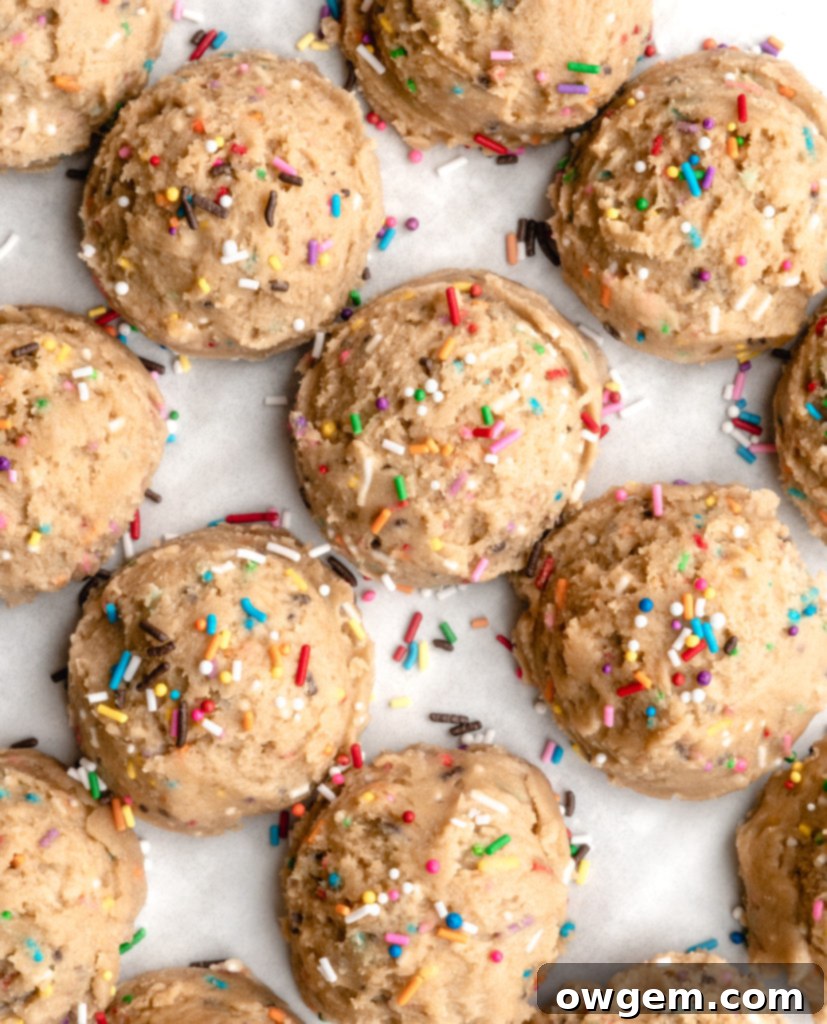
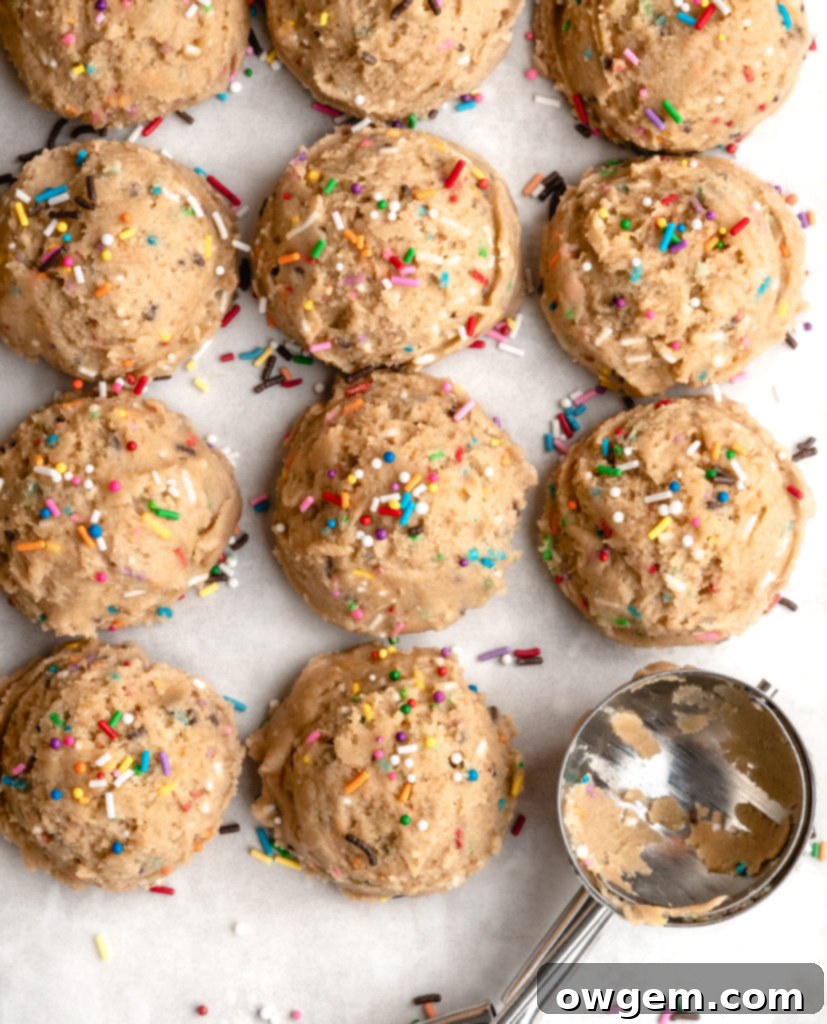
- Scoop and Chill: Line a baking sheet with parchment paper. Using a 2-tablespoon cookie scoop or your hands, form uniform balls of cookie dough. Place all the scooped cookies onto the prepared baking sheet. It’s okay if they are close together for this initial step. Transfer the baking sheet to the freezer and allow the cookie dough to rest and chill for a crucial 30 minutes. Do not skip this step! We’ll explain why it’s so important next.
- Preheat Oven: While the cookies are chilling, preheat your oven to 350°F (175°C).
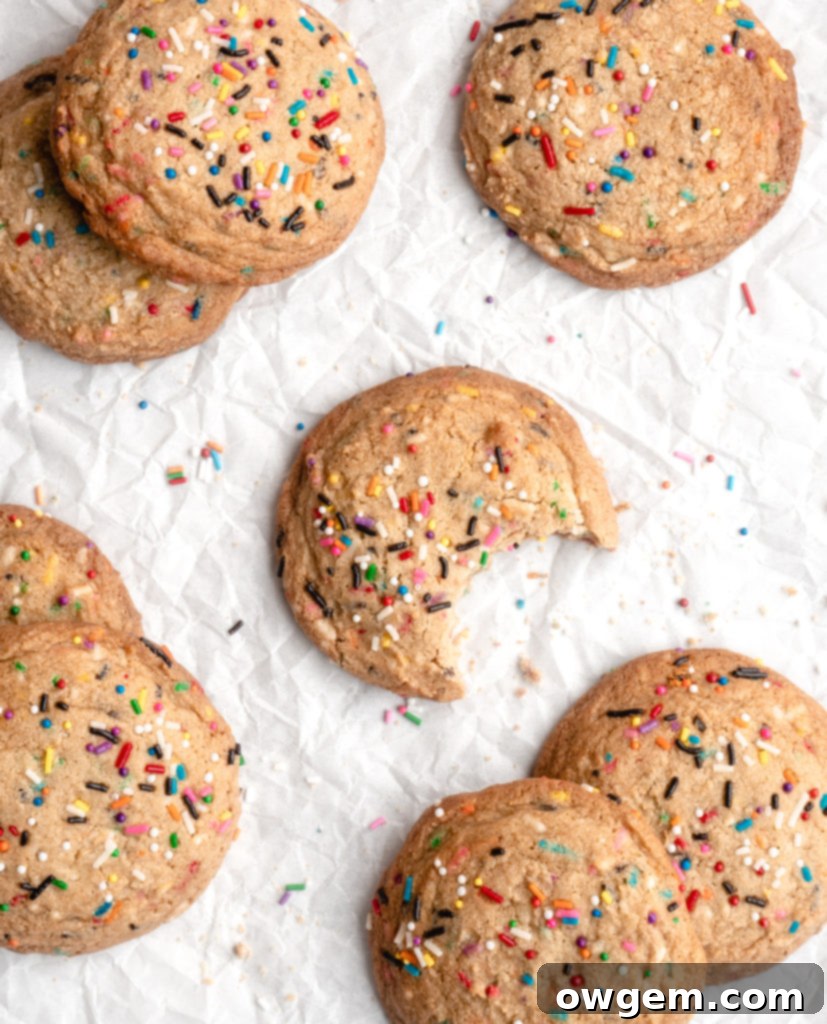
- Arrange and Bake: After 30 minutes, remove the baking sheet from the freezer. Arrange the chilled cookie dough balls evenly onto three separate baking sheets lined with parchment paper, allowing ample space between each cookie (8-9 cookies per sheet is ideal to prevent them from melting into each other). Bake for 11-13 minutes, or until the edges are lightly golden and the centers are still slightly soft. They will firm up as they cool.
- Cooling: Once baked, remove the cookies from the oven and let them cool on the baking sheets for 5-10 minutes before transferring them to a wire rack to cool completely. This allows them to set properly and prevents them from breaking.
A note on baking in batches: If you only have one or two baking sheets, keep the unbaked cookie dough in the refrigerator to maintain its chill while the first batch bakes. This ensures consistent results across all batches.

The Crucial Chill: Why Resting Dough Matters
It’s incredibly tempting to pop those freshly mixed cookie dough balls directly into the oven. We’ve all been there, eager for that first warm bite! However, resisting the urge and allowing your funfetti cookie dough a short 30-minute resting period in the freezer or refrigerator is a step you absolutely should not skip. This chilling period, often referred to as “dough rest,” offers a multitude of benefits that profoundly impact the final texture, flavor, and appearance of your cookies.
- Prevents Excessive Spreading: This is perhaps the most immediate and noticeable benefit. When fats (butter) in the dough are cold, they are solid. As the cold dough enters a hot oven, the butter takes longer to melt. This slower melting process allows the cookie to set its structure before spreading too much, resulting in thicker, chewier cookies with a better shape. If you bake warm dough, the butter melts quickly, causing the cookies to flatten out excessively, leading to thin, crispy (and often greasy) results.
- Enhances Texture: Chilling allows the flour to fully hydrate and absorb any “free-floating” liquid in the dough. This leads to a more uniform, tender, and less crumbly texture. Well-hydrated flour also helps control spread, further contributing to that desired chewy interior.
- Concentrates Flavors: As the dough rests, the ingredients have time to mingle and meld. The sugars, especially the brown sugar, begin to dissolve and distribute more evenly. This subtle process deepens the overall flavor profile, making your funfetti cookies taste richer and more complex than those baked immediately. It’s similar to how flavors in a stew develop over time!
- Improved Workability: Chilled dough is firmer and less sticky, making it much easier to handle, scoop, and transfer to baking sheets without deforming.
Even a short 30-minute chill makes a significant difference. For even more intense flavor and minimal spread, you could extend the chill to a few hours or even overnight, though it’s not strictly necessary for this particular recipe to achieve fantastic results.
Choosing Your Sprinkles: A Guide to Funfetti Aesthetics
The sprinkles are what give funfetti cookies their signature joyful appearance, and the type you choose can impact both the look and texture of your finished product. The choice is 100% yours, but here’s a little guidance:
- Nonpareils: These are the tiny, round, ball-shaped sprinkles. They provide a dense burst of color and a satisfying crunch. However, nonpareils are often prone to “bleeding” their color into the cookie dough, especially during mixing or if the dough is particularly warm. While a little bleed can add a pastel hue, too much can muddy the vibrant rainbow effect.
- Jimmies (or Strands): These are the more tubular, rod-shaped sprinkles. Jimmies are generally less prone to bleeding than nonpareils because they often have a thin waxy coating that helps them retain their color during the baking process. They offer a slightly softer chew compared to the crunch of nonpareils.
- Confetti Sprinkles (Quins): These are flat, disc-shaped sprinkles. They offer larger pops of color and a distinct texture. Like jimmies, they tend to hold their color better than nonpareils.
Personally, I love to use a combination to get the best of both worlds – vibrant color and varied texture! My preferred mix often includes a majority of rainbow jimmies (about 3/4 of the total sprinkle amount) for their color retention and classic funfetti look, complemented by a smaller amount of chocolate jimmies for a hint of contrasting color and flavor, and a touch of rainbow nonpareils for that extra crunchy pop and visual variety (about 1/8 each for chocolate jimmies and rainbow nonpareils). Don’t be afraid to experiment with your ratios or choose specific color themes for holidays or special occasions!
Feeling extra indulgent? Feel free to fold in some white chocolate chips along with your sprinkles for an added layer of sweetness and creamy texture. They melt beautifully and complement the funfetti flavor profile perfectly.
Tips for Perfect Funfetti Cookies Every Time
Achieving bakery-quality funfetti cookies at home is entirely possible with a few insider tips:
- Measure Flour by Weight: This cannot be stressed enough. A kitchen scale is an inexpensive tool that will drastically improve your baking accuracy. Volumetric measurements (cups) can vary wildly.
- Room Temperature Ingredients: Ensure your butter and eggs are at room temperature. This allows them to emulsify properly, creating a smooth, homogenous dough that bakes evenly.
- Don’t Overmix: Once the flour is added, mix just until no streaks of dry ingredients remain. Overmixing develops gluten, leading to tough, dense cookies.
- The Power of Chilling: Seriously, do not skip the dough rest! It’s the secret to thicker, chewier cookies that hold their shape.
- Even Scooping: Use a cookie scoop to ensure all your cookies are the same size. This leads to uniform baking, so all cookies are perfectly done at the same time.
- Space Them Out: Give your cookies plenty of room on the baking sheet. If they’re too close, they’ll spread into each other, and they won’t bake evenly. Use multiple baking sheets if necessary.
- Know Your Oven: Oven temperatures can vary significantly. If your cookies are consistently spreading too much or baking too quickly, consider investing in an oven thermometer to verify accuracy.
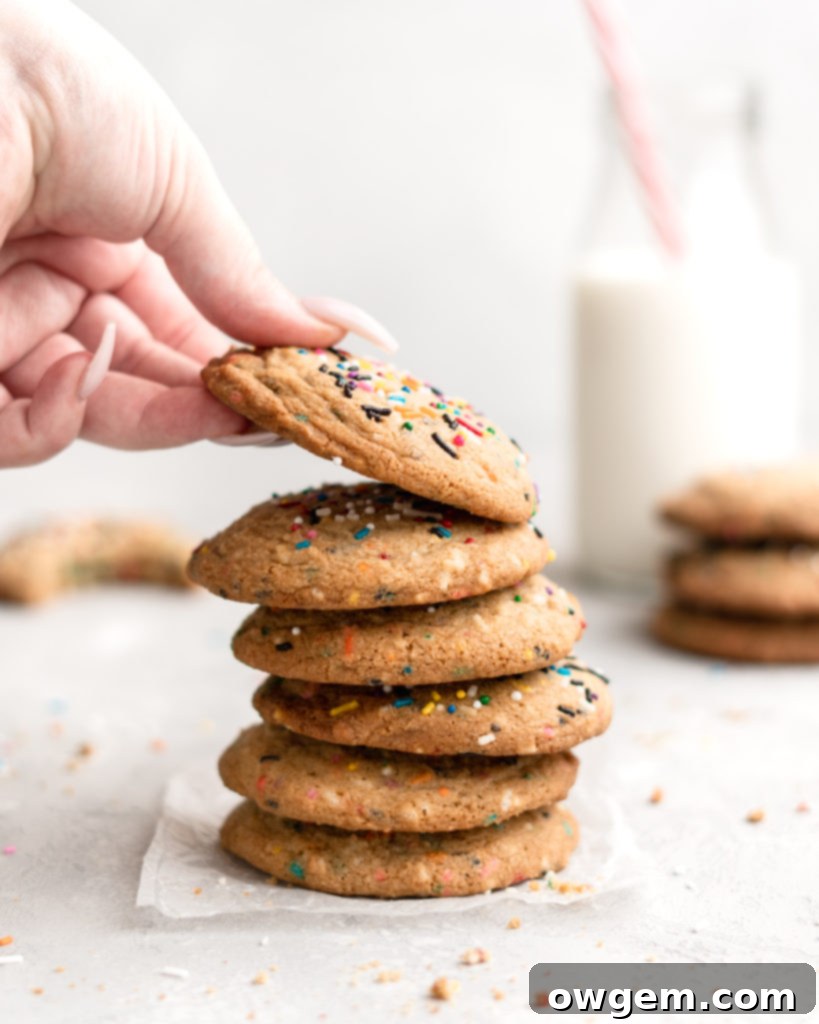
- Watch for Doneness: Funfetti cookies are done when the edges are set and lightly golden, but the centers still look slightly soft and puffed. They will continue to cook slightly from residual heat on the baking sheet.
- Cool on the Sheet First: Let the cookies cool on the hot baking sheet for 5-10 minutes before transferring to a wire rack. This allows them to set fully, preventing them from breaking apart when moved.
Variations and Customizations
While these classic funfetti cookies are perfect as is, there’s always room for a little creative flair:
- Flavor Extracts: Beyond vanilla, try a touch of almond extract for a marzipan-like note, lemon extract for a brighter cookie, or even a hint of butter emulsion for an extra buttery flavor.
- Mix-Ins: Introduce other delicious additions! White chocolate chips, mini M&M’s, chopped nuts (if you like crunch), or even other small candies can add new dimensions. Just be mindful of the sugar content.
- Holiday Themes: Swap out rainbow sprinkles for seasonal colors! Red and green for Christmas, pastels for Easter, orange and black for Halloween, or red, white, and blue for patriotic celebrations.
- Glaze or Frosting: For an extra touch of decadence, a simple vanilla glaze (powdered sugar, milk, vanilla) or a swirl of cream cheese frosting (as used in red velvet macarons) can elevate these cookies to dessert bar status.
Storage and Freezing Instructions
Proper storage ensures your funfetti cookies remain delicious for as long as possible:
- Baked Cookies: Store cooled funfetti cookies in an airtight container at room temperature for up to 3-5 days. For optimal freshness, place a slice of bread in the container with the cookies; the cookies will absorb moisture from the bread, keeping them softer.
- Freezing Baked Cookies: Once completely cooled, place baked cookies in a single layer on a baking sheet and freeze until solid (about 1-2 hours). Transfer the frozen cookies to a freezer-safe airtight container or heavy-duty freezer bag. They can be stored for up to 3 months. Thaw at room temperature or warm gently in the microwave for a few seconds.
- Freezing Cookie Dough: Scoop the cookie dough as directed in the recipe, then place the dough balls on a parchment-lined baking sheet. Freeze until solid. Once frozen, transfer the dough balls to a freezer-safe airtight container or freezer bag. Frozen cookie dough can be stored for up to 3 months. When ready to bake, place frozen dough balls on a baking sheet and bake as usual, adding an extra 1-3 minutes to the baking time, or allow them to thaw slightly in the refrigerator for 30-60 minutes before baking.
Frequently Asked Questions (FAQ)
Here are answers to some common questions about making funfetti cookies:
- Q: Why did my funfetti cookies spread too much?
- A: This is often due to butter that was too warm, not chilling the dough sufficiently, or too little flour. Ensure your butter is at room temperature (not melted), measure flour by weight, and always chill the dough for at least 30 minutes.
- Q: My sprinkles bled into the dough. How can I prevent this?
- A: Some sprinkles, especially nonpareils, are more prone to bleeding. To minimize this, use jimmies, avoid overmixing the dough once sprinkles are added, and ensure your dough is cold before baking. You can also add a portion of the sprinkles just before baking for a fresher look.
- Q: Can I use a cake mix to make funfetti cookies?
- A: While there are recipes for “cake mix cookies,” this recipe is designed from scratch for a superior texture and flavor. Using a cake mix would result in a different cookie profile, often more cake-like than chewy.
- Q: Can I make the cookie dough ahead of time?
- A: Absolutely! You can prepare the dough and chill it in the refrigerator for up to 3 days, or freeze scooped dough balls for up to 3 months. This is perfect for meal prep or having fresh cookies on demand.
- Q: How do I know when my funfetti cookies are done baking?
- A: Look for lightly golden edges and centers that still appear slightly soft and puffy. They might look slightly underbaked, but they will continue to set as they cool. Overbaking will lead to dry, hard cookies.

Get the Recipe:
Easy Funfetti Cookies
Pin
Rate
Ingredients
- 300 g All Purpose Flour,, or about 2 cups measured volumetrically
- 1 tsp Baking Soda
- 1 tsp Salt
- 1 cup Unsalted Butter,, at room temperature
- 1 cup Light Brown Sugar
- ½ cup White Sugar
- 2 Large Eggs
- 1 Egg Yolk
- 2 tsp Vanilla
- 2/3 cup Sprinkles
Equipment
-
Stand mixer
Instructions
-
In a medium to large sized bowl, add in flour, baking soda, and salt. Whisk well to combine, then set aside.
-
In a large bowl, or stand mixer (fitted with the paddle attachment), add the butter and both sugars and beat for 3 minutes, it should look light and fluffy, and expanded in size.
-
In a separate bowl, whisk together the eggs, yolk and vanilla, then add to the batter and beat on high for another 2 minutes, scraping at the edges periodically. Add in the flour mixture and mix on low until combined, scraping at the edges. Ensure it is well combined, but do not overmix. Add in the sprinkles, and fold with a spatula until well dispersed.
-
Prepare a baking sheet with parchment paper. Using your hands or a scoop, arrange cookies to be about 2 tbsp each. Place all the cookies onto the baking sheet (do not worry about arrangement yet), and place into the freezer for 30 minutes to rest (don’t skip, see above!)
-
Preheat oven to 350°F.
-
Remove baking sheet from the freezer, and arrange cookies evenly onto 3 baking sheets fitted with parchment paper (I do 8-9 per sheet). Place into the oven and bake for 11-13 minutes.
-
Note: If baking in batches, keep cookies cold before baking by keeping them in the fridge.
Conclusion
There’s an undeniable magic to funfetti cookies. Their vibrant appearance promises joy, and with this recipe, their taste truly delivers! From the buttery, chewy base to the delightful pop of colorful sprinkles, these cookies are perfect for birthdays, holidays, or simply brightening an ordinary day. They’re easy to make, incredibly satisfying, and always a crowd-pleaser. So gather your ingredients, embrace the rainbow, and get ready to bake the best homemade funfetti cookies you’ve ever tasted! Happy baking!
Related Recipes
Looking for more delightful cookie and dessert recipes? Check out these other favorites:
HOW TO MAKE MACARONS: A STEP BY STEP GUIDE + TIPS/TRICKS: Dive into the elegant world of French macarons with this comprehensive guide. Learn all the techniques and troubleshooting tips to master these delicate confections.
CHEWY BROWNED BUTTER CHOCOLATE CHIP COOKIES. Elevate your classic chocolate chip cookie game with the rich, nutty flavor of browned butter. These cookies are perfectly chewy, incredibly tender, and bursting with flavor – everything you’ve ever wanted in a chocolate chip cookie and more.
RED VELVET MACARONS. Experience the luxurious combination of classic red velvet flavor and the delicate texture of a macaron. These stunning red velvet macarons are completed with a luscious, tangy cream cheese filling, making them an unforgettable dessert.

