Fluffy, Fragrant, and Flaky: The Ultimate Blackberry Earl Grey Scones Recipe
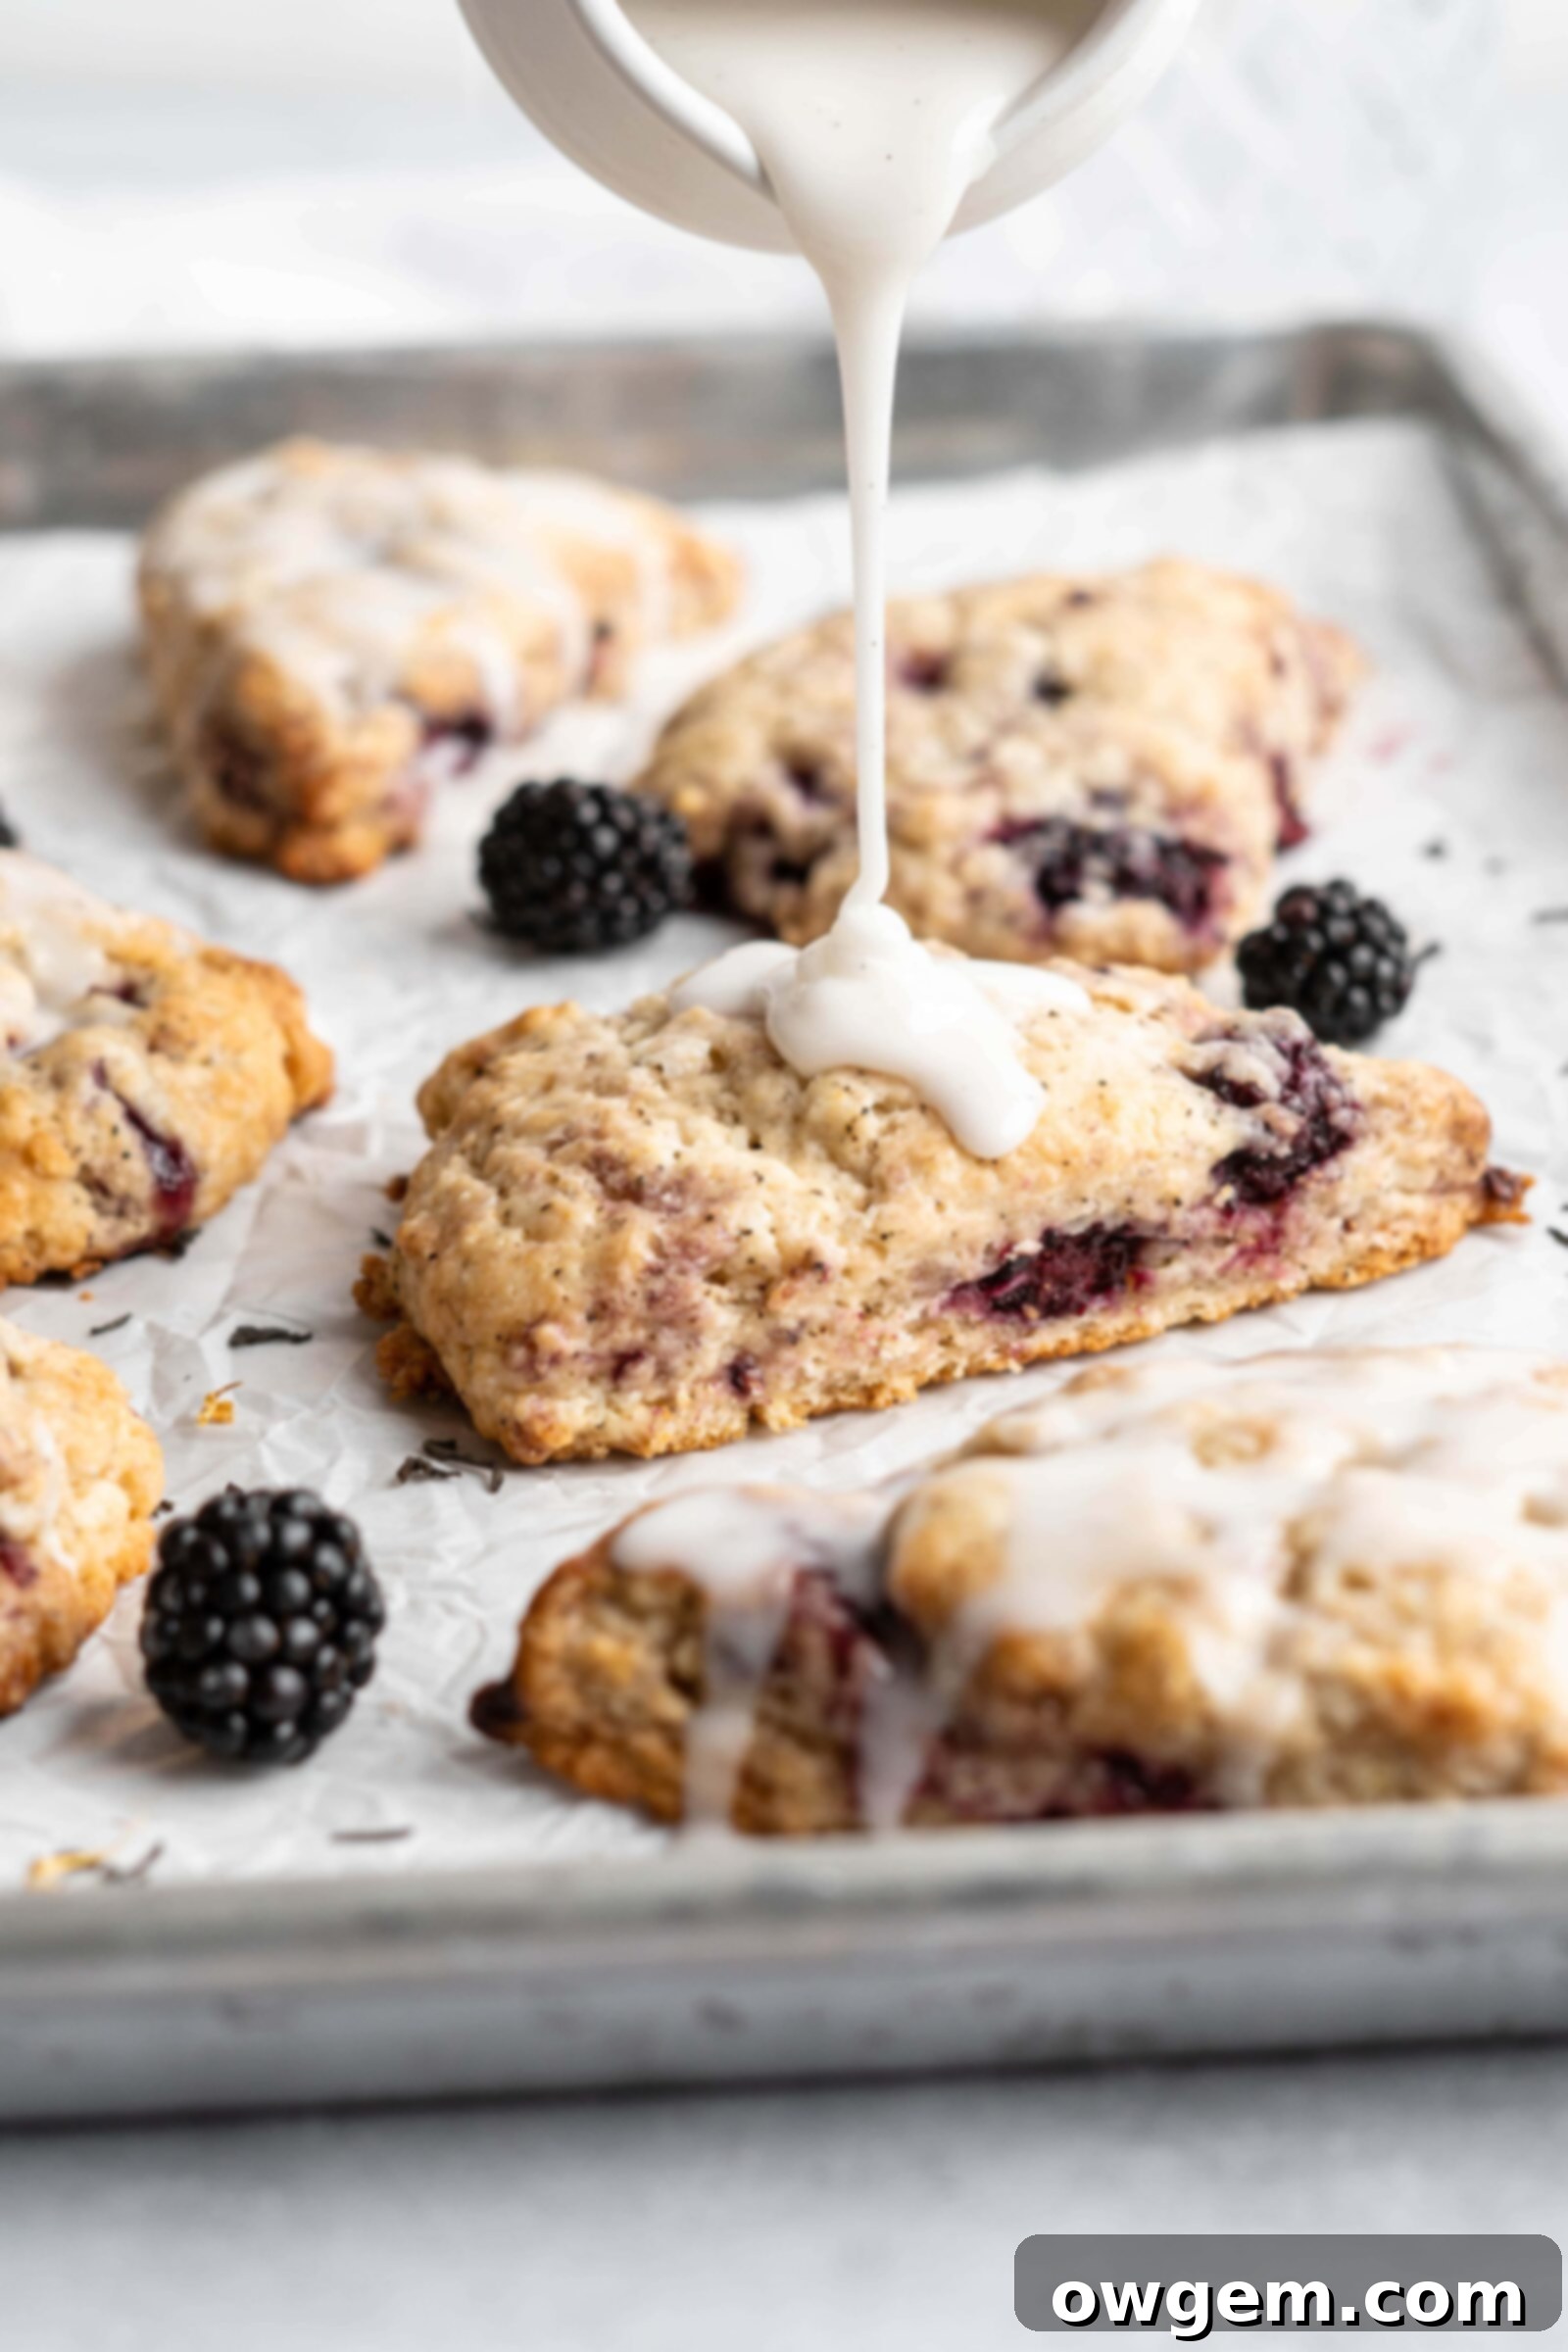
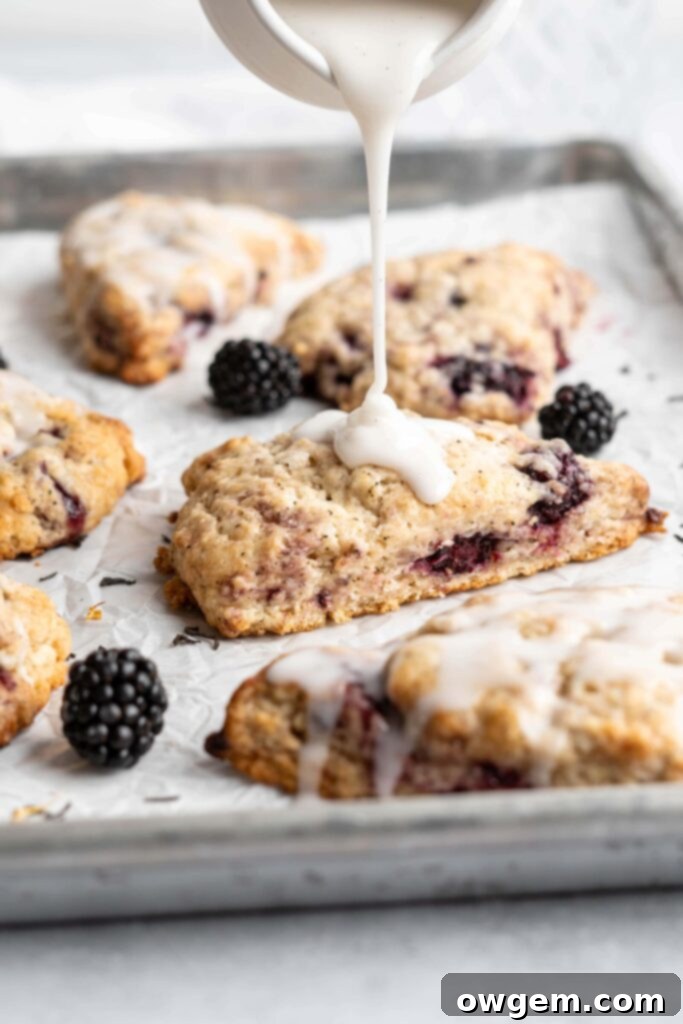
Indulge in a truly exquisite tea-time treat with these incredible Blackberry Earl Grey Scones. Crafted with the vibrant burst of fresh blackberries and the sophisticated aroma of Earl Grey tea, these scones are a dream come true for any tea enthusiast. Each bite offers an unparalleled experience: unbelievably soft, perfectly flaky, and delightfully moist, brimming with the rich, citrusy notes of bergamot from the Earl Grey and the sweet-tart goodness of ripe blackberries. Glazed to perfection, they are an inviting complement to your favorite cup of tea or a luxurious accompaniment to a dollop of clotted cream or a pat of rich butter.
Why You’ll Love this Blackberry Earl Grey Scone Recipe
These Blackberry Earl Grey Scones aren’t just a recipe; they’re an experience waiting to happen. Here’s why you’ll fall head over heels for them:
- Authentic Earl Grey Flavor: Unlike some recipes that only hint at the tea, these scones are infused with real Earl Grey tea, ensuring a deeply aromatic and distinctive taste. We use quality tea bags (like those from Tazo) to achieve this bold flavor profile.
- Luxuriously Soft and Flaky Texture: Thanks to the generous use of rich, cold butter and heavy whipping cream, these scones boast an incredibly tender crumb and perfectly flaky layers that melt in your mouth.
- Accessible for All Bakers: Don’t let their elegant appearance fool you; scones are surprisingly simple to make. This recipe is straightforward, making it ideal for bakers of all skill levels, from beginners to seasoned pros.
- Dual Tea Infusion for Maximum Aroma: We take the Earl Grey experience seriously! The tea is not only steeped directly into the heavy cream but also mixed into the dry dough, ensuring every bite is bursting with that iconic bergamot fragrance.
- Bursting with Fresh Blackberries: The tartness and juiciness of fresh blackberries provide a delightful contrast to the floral Earl Grey, creating a harmonious flavor balance that’s simply irresistible.
- A Zesty Citrus Brightness: A subtle hint of lemon zest and fresh lemon juice in the dough elevates the flavors, adding a vibrant zing that complements both the Earl Grey and the blackberries beautifully.
- Perfect for Cold Butter: This recipe actually *requires* cold butter, making it an excellent way to use up butter straight from the fridge and achieve that coveted flaky texture.
- An Ideal Treat for Any Occasion: Whether it’s a leisurely weekend breakfast, a special brunch, an elegant afternoon tea, or simply a comforting snack, these scones are always a welcome indulgence.
Essential Ingredient Notes for Perfect Scones
Understanding the role of each ingredient is key to achieving scone perfection. Here’s a closer look at what goes into these delightful Blackberry Earl Grey Scones:
- Earl Grey Tea: This is the star of our scones! Earl Grey is a black tea flavored with oil of bergamot, a citrus fruit. We use it two ways: steeped in the heavy cream for a deep, mellow flavor, and finely chopped or from a tea bag directly in the dough for more intense bursts of bergamot. The quality of your tea will directly impact the final flavor, so choose a brand you love.
- Fresh Blackberries: Plump, juicy blackberries add a wonderful tartness and a beautiful visual appeal to the scones. They stand up well to baking and provide a lovely contrast to the creamy, fragrant dough. While fresh is always best, you can use frozen blackberries (do not thaw) and gently toss them in a little flour before adding to the dough to prevent excessive bleeding.
- Cold Unsalted Butter: Absolutely crucial for flaky scones! The cold butter creates steam pockets as it bakes, which separate the layers of dough, resulting in that irresistible flakiness. Unsalted butter gives you control over the overall salt content of the recipe. Cut it into small cubes and keep it chilled until the last moment.
- Heavy Cream: This rich dairy product contributes significantly to the scones’ tender crumb and moist texture. Its high-fat content ensures a luxurious mouthfeel and helps the dough come together without overworking it.
- All-Purpose Flour: The foundation of our scones. All-purpose flour provides the necessary structure. Measuring it correctly, preferably by weight (grams), will prevent dry or overly dense scones.
- Granulated Sugar: Adds sweetness to balance the tart blackberries and robust Earl Grey, while also aiding in browning and contributing to the tender texture.
- Baking Powder: Our primary leavening agent. It reacts with moisture and heat to create carbon dioxide bubbles, giving the scones their lift and airy texture.
- Salt: A pinch of salt enhances all the other flavors, making the berries brighter and the Earl Grey more pronounced.
- Lemon Zest & Juice: The zest infuses aromatic citrus notes directly into the dough, while a splash of juice adds a touch of acidity that brightens the overall flavor profile and helps activate the baking powder.
- Vanilla Extract: A classic flavor enhancer that adds warmth and depth, complementing both the tea and the fruit.
How to make Delicious Blackberry Earl Grey Scones
Making these delightful scones is a rewarding process. Follow these step-by-step instructions for perfect results:
1) Steep Earl Grey Tea in Cream: Begin by gently heating the heavy cream in a small saucepan over medium heat until it just begins to show small bubbles around the edges. Remove it from the heat, add three Earl Grey tea bags, and allow them to steep. Transfer the cream mixture to the fridge to cool for about an hour. After steeping, remove the tea bags, squeezing them gently to extract all the flavorful cream, then return the steeped cream to the fridge for another hour, or until thoroughly chilled. This cold, tea-infused cream is essential for flavor and texture.
2) Whisk Dry Ingredients: In a large mixing bowl, combine the all-purpose flour, granulated sugar, baking powder, and salt. Carefully snip open one Earl Grey tea bag and add its contents (the loose tea leaves) directly to the bowl. Whisk these dry ingredients together thoroughly to ensure even distribution of the leavening agent and tea flavor.
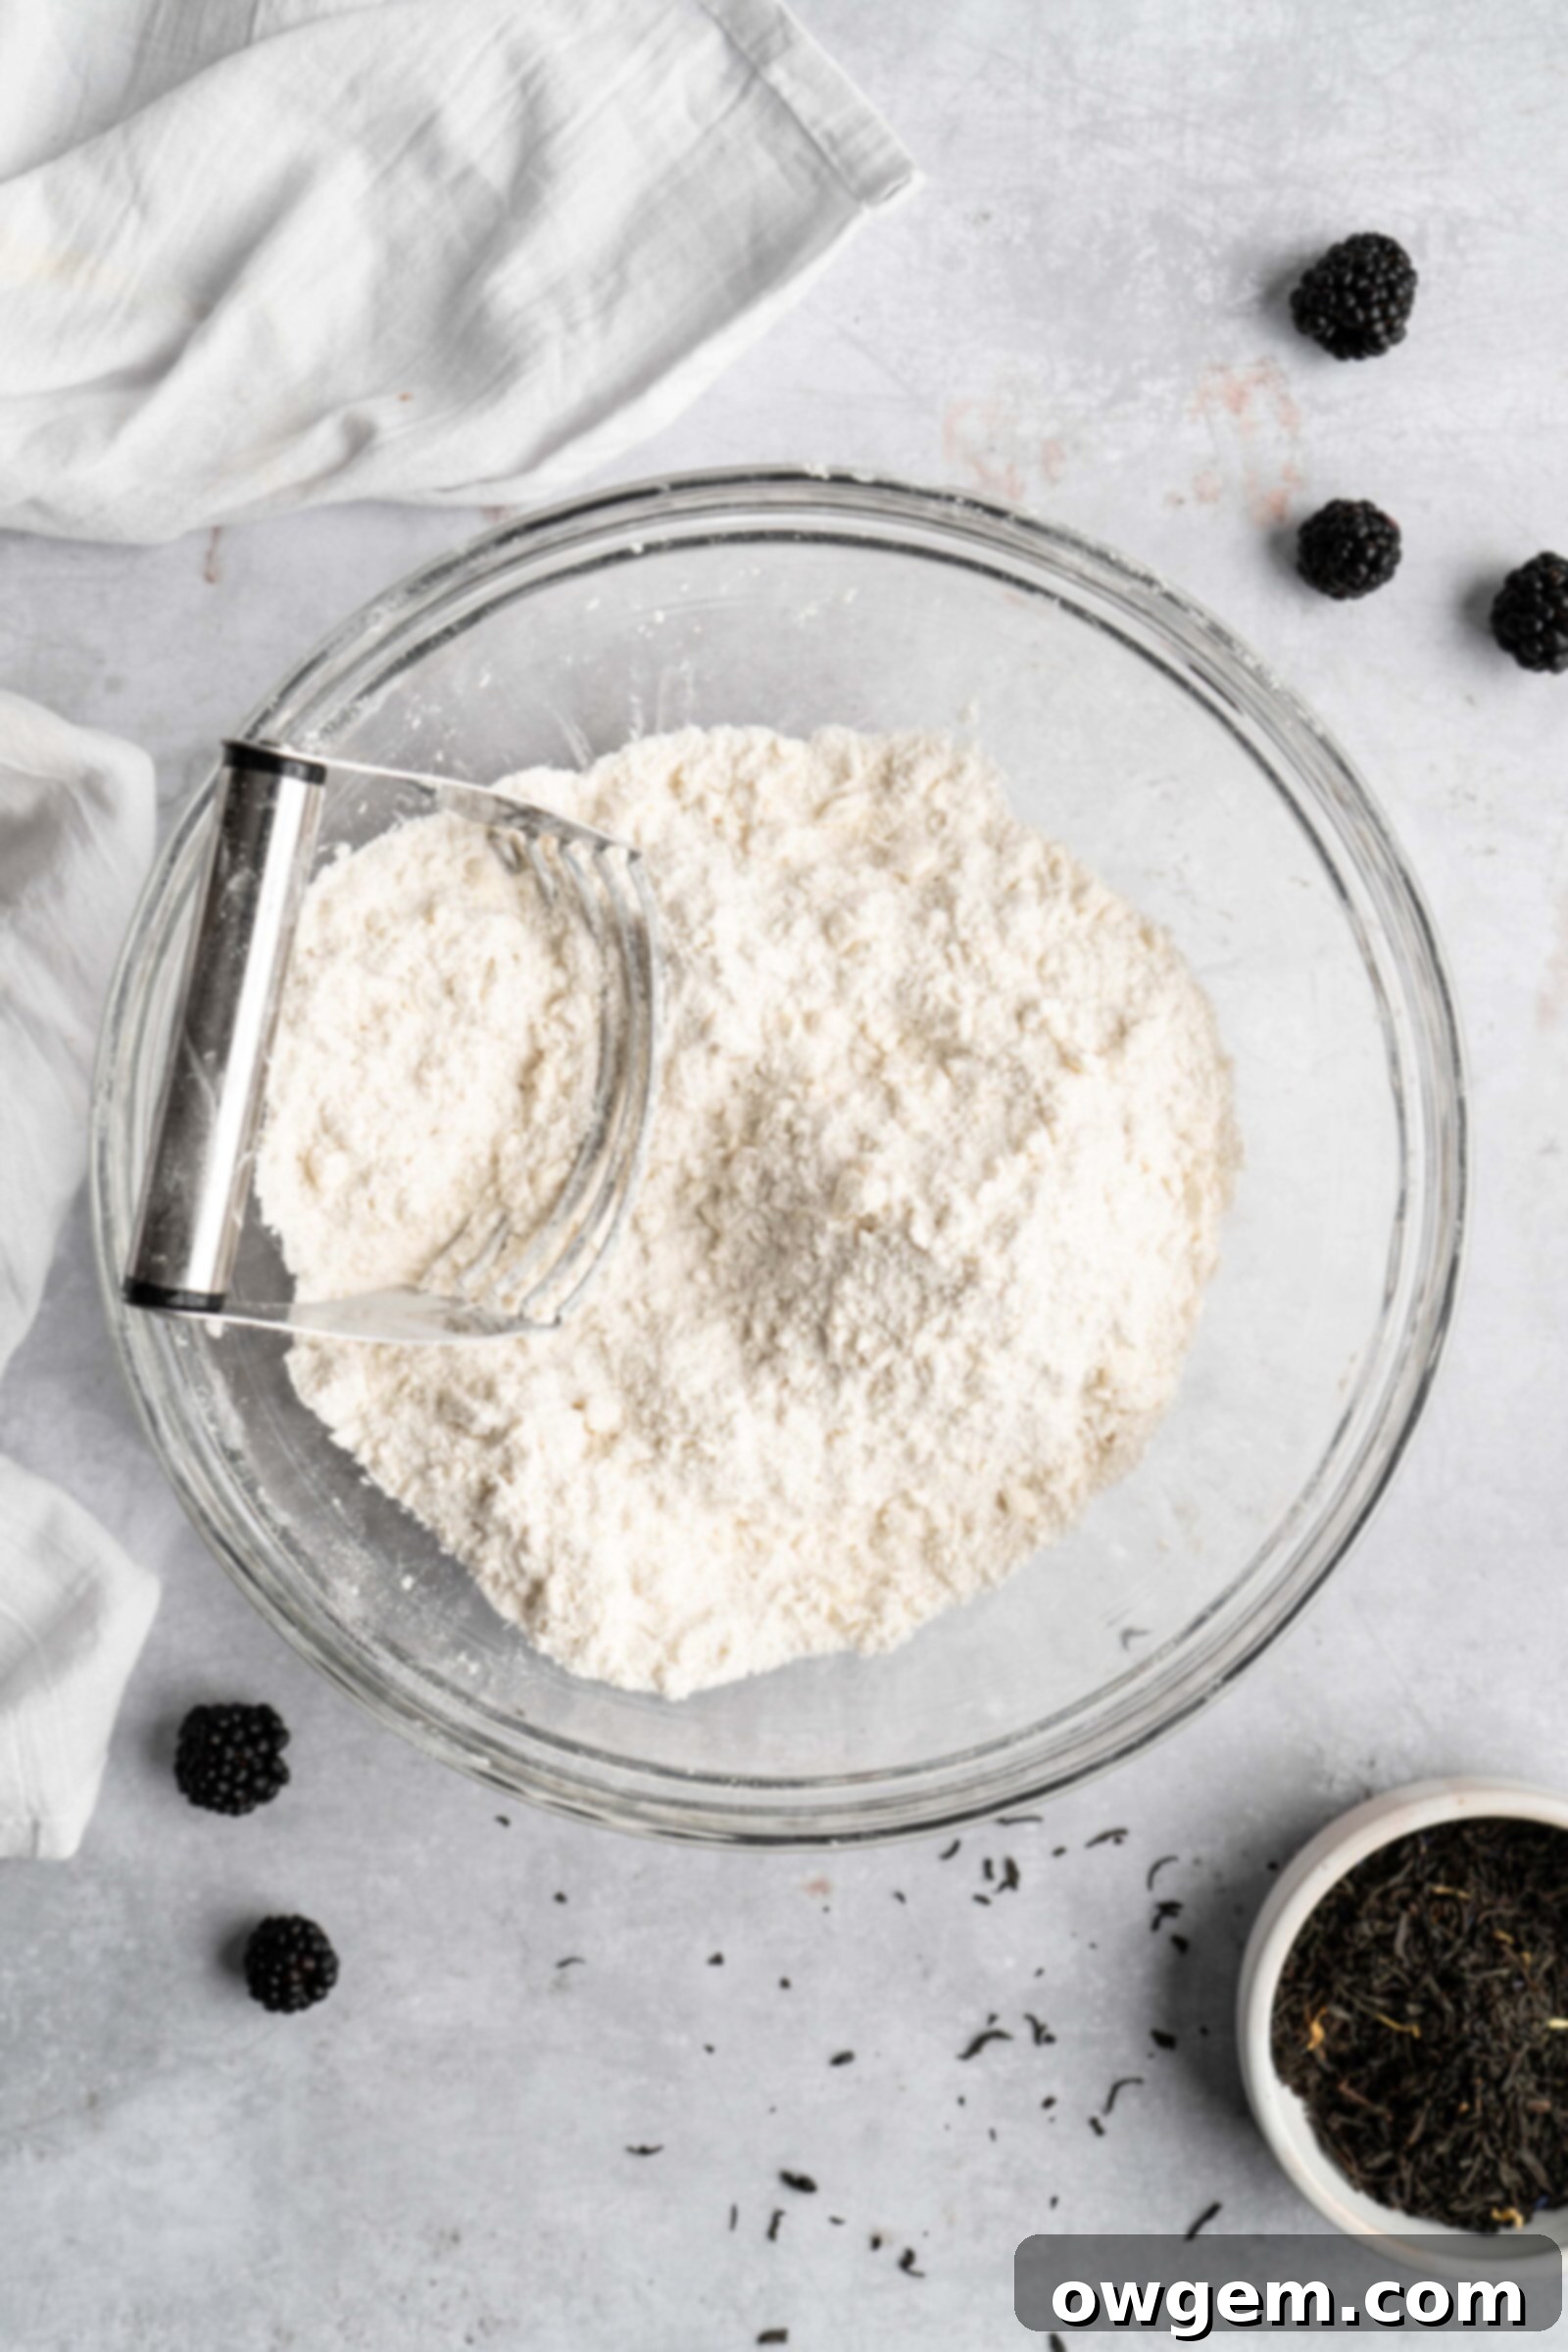
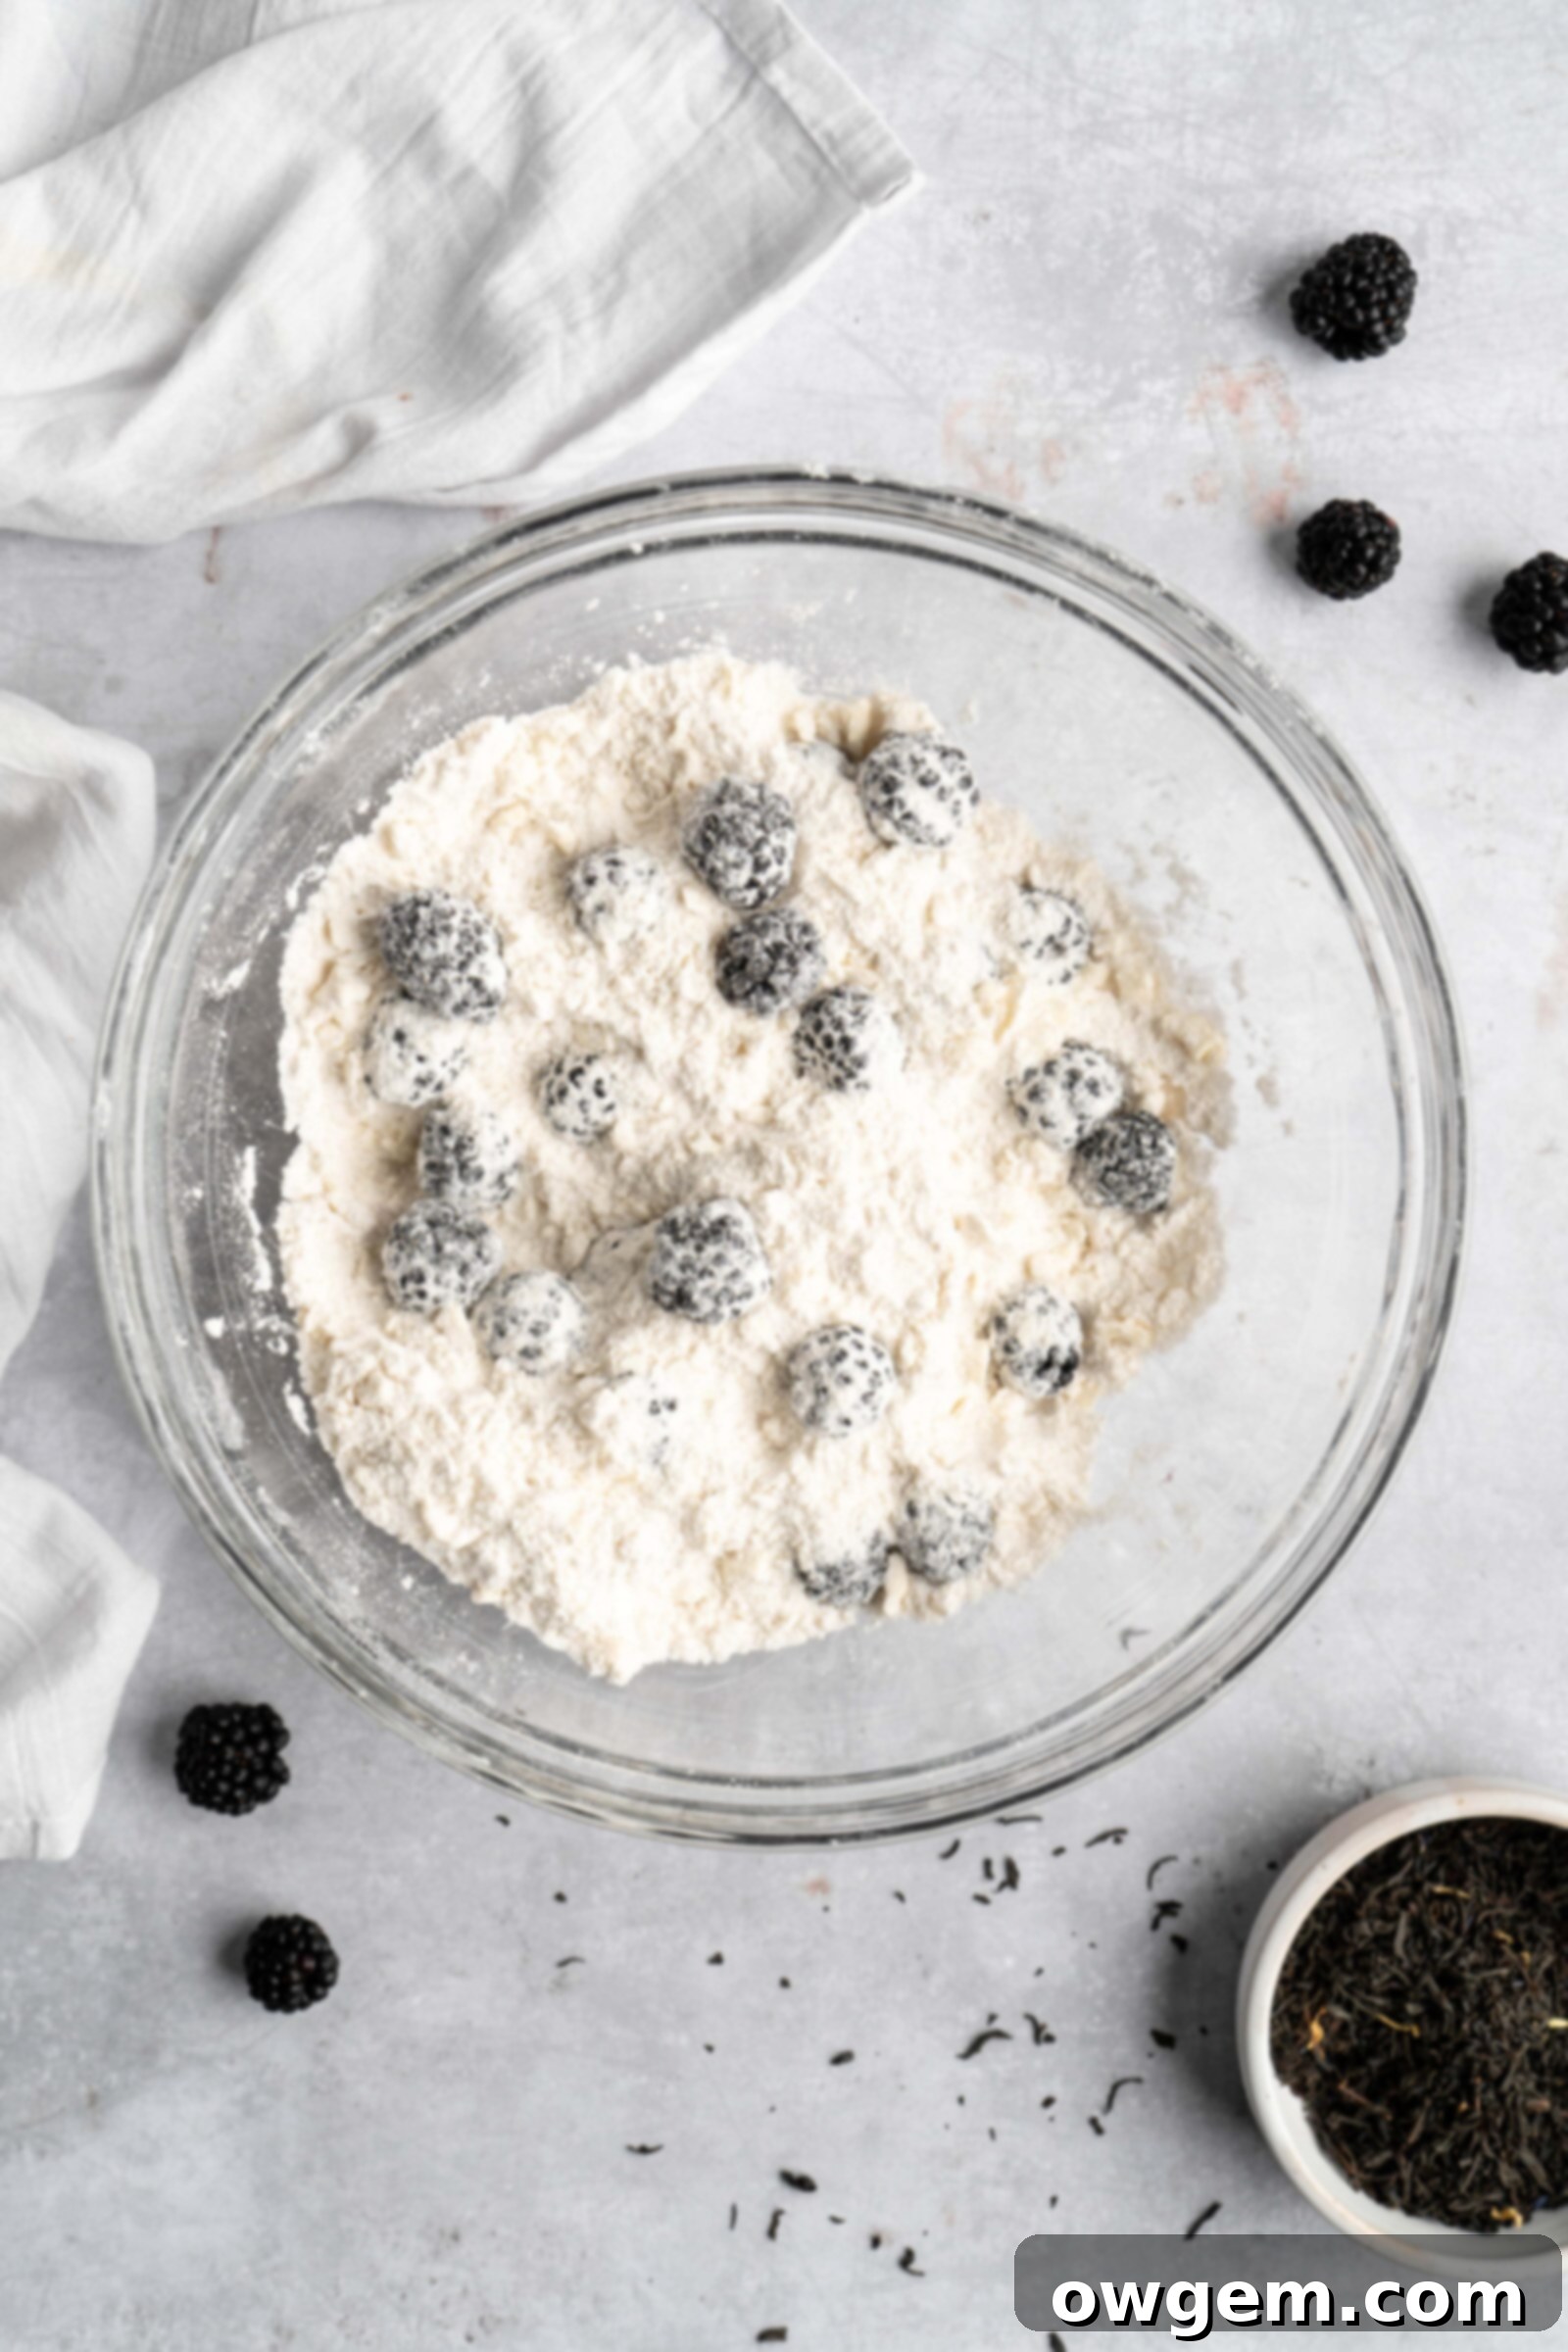
3) Cut in Cold Butter: Add the cubed, extra-cold unsalted butter to the dry ingredients. Using your fingertips or a pastry cutter, work the butter into the flour mixture. The goal is to break down the butter until it resembles coarse meal with some pea-sized pieces remaining. Avoid overworking, as this will warm the butter too much. Next, gently toss in the fresh blackberries, coating them lightly with the flour mixture to prevent them from sinking to the bottom during baking.
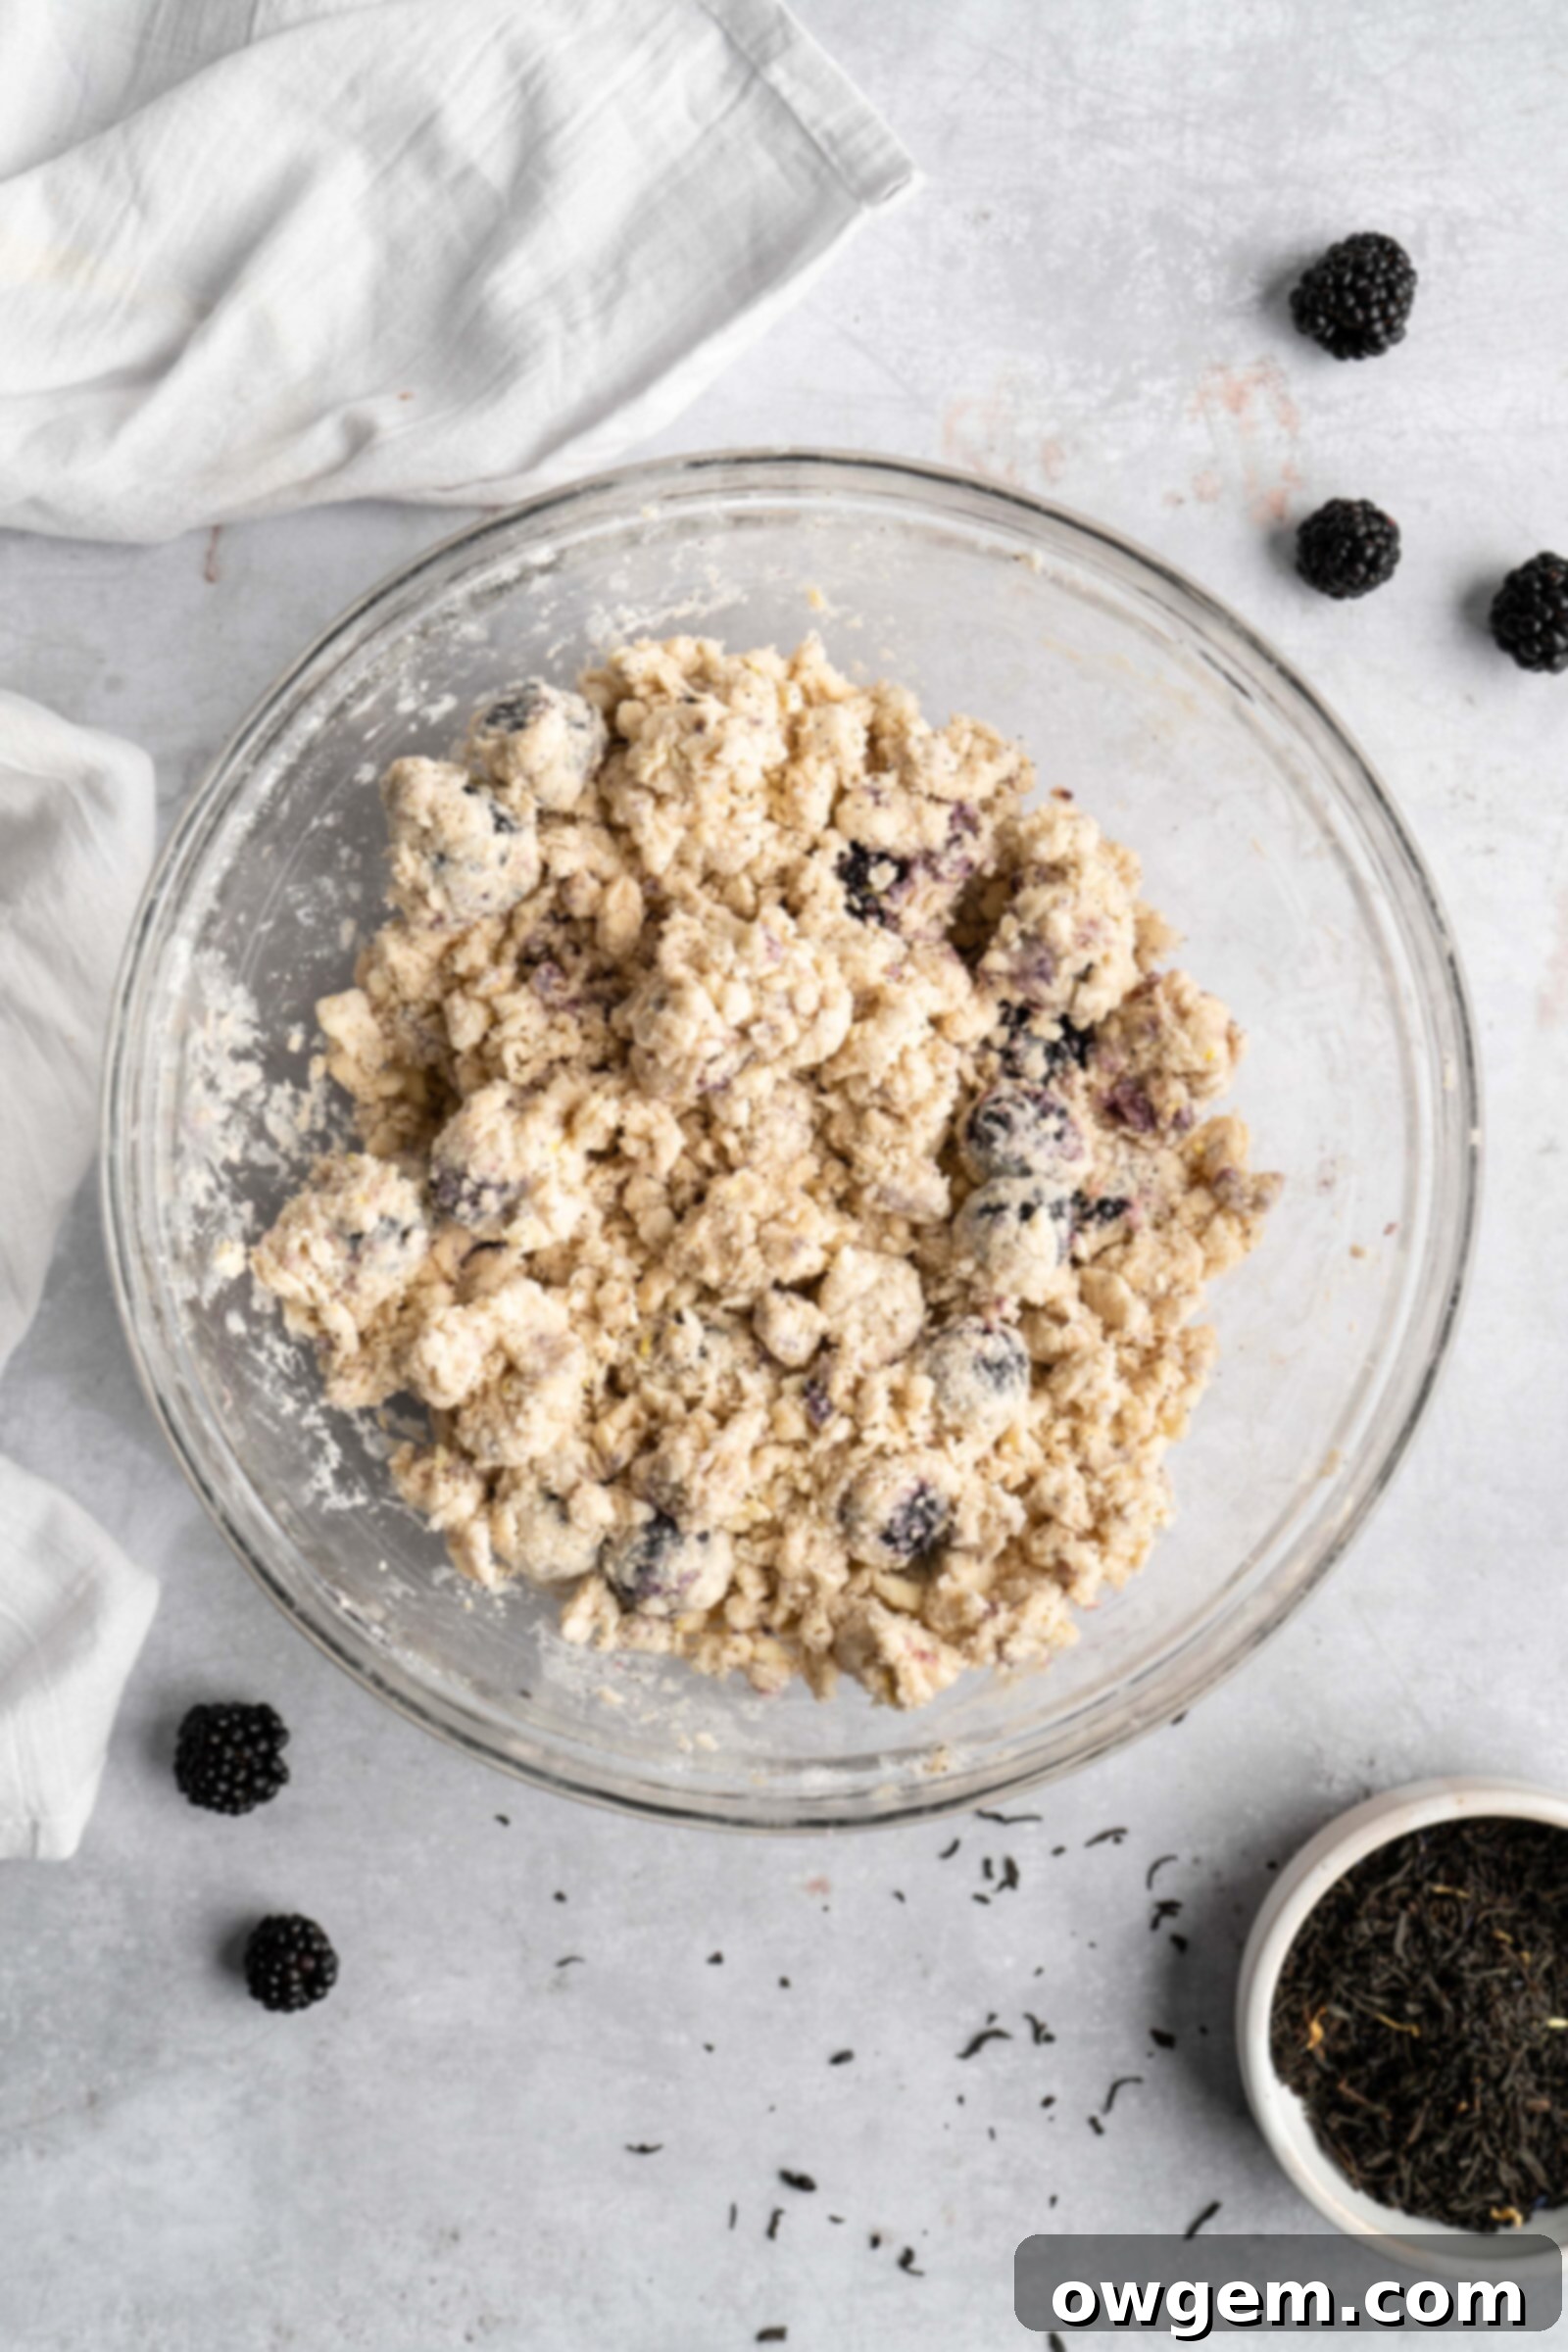
4) Add Wet Ingredients: In a separate small bowl, combine the chilled Earl Grey-steeped heavy cream, fresh lemon juice, and vanilla extract. Drizzle this liquid mixture over the dry ingredients in the large bowl. Start by mixing with a fork, gently tossing until the dough just begins to come together into a shaggy consistency. Once partially combined, switch to using your hands to lightly bring the dough together, being careful not to overmix. If the dough seems too dry, add heavy cream one teaspoon at a time until it just holds together.
5) Shape the Dough: Turn the shaggy dough out onto a lightly floured work surface. Using your hands, gently pat and shape the dough into a disc about 6-7 inches in diameter and approximately 1 inch thick. Work quickly and handle the dough as little as possible to keep the butter cold.
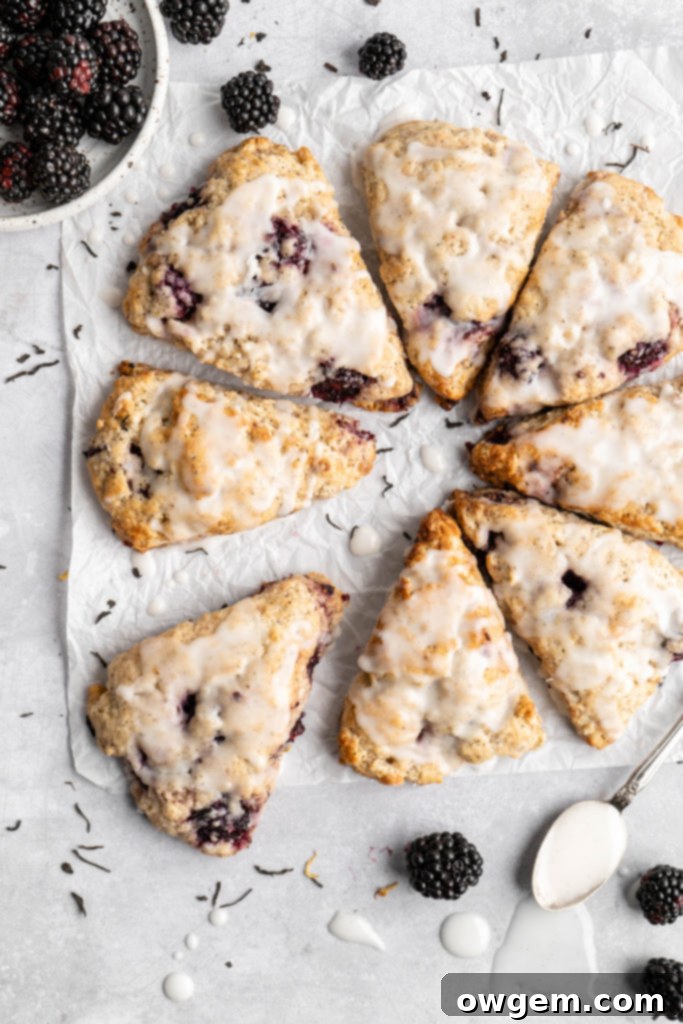
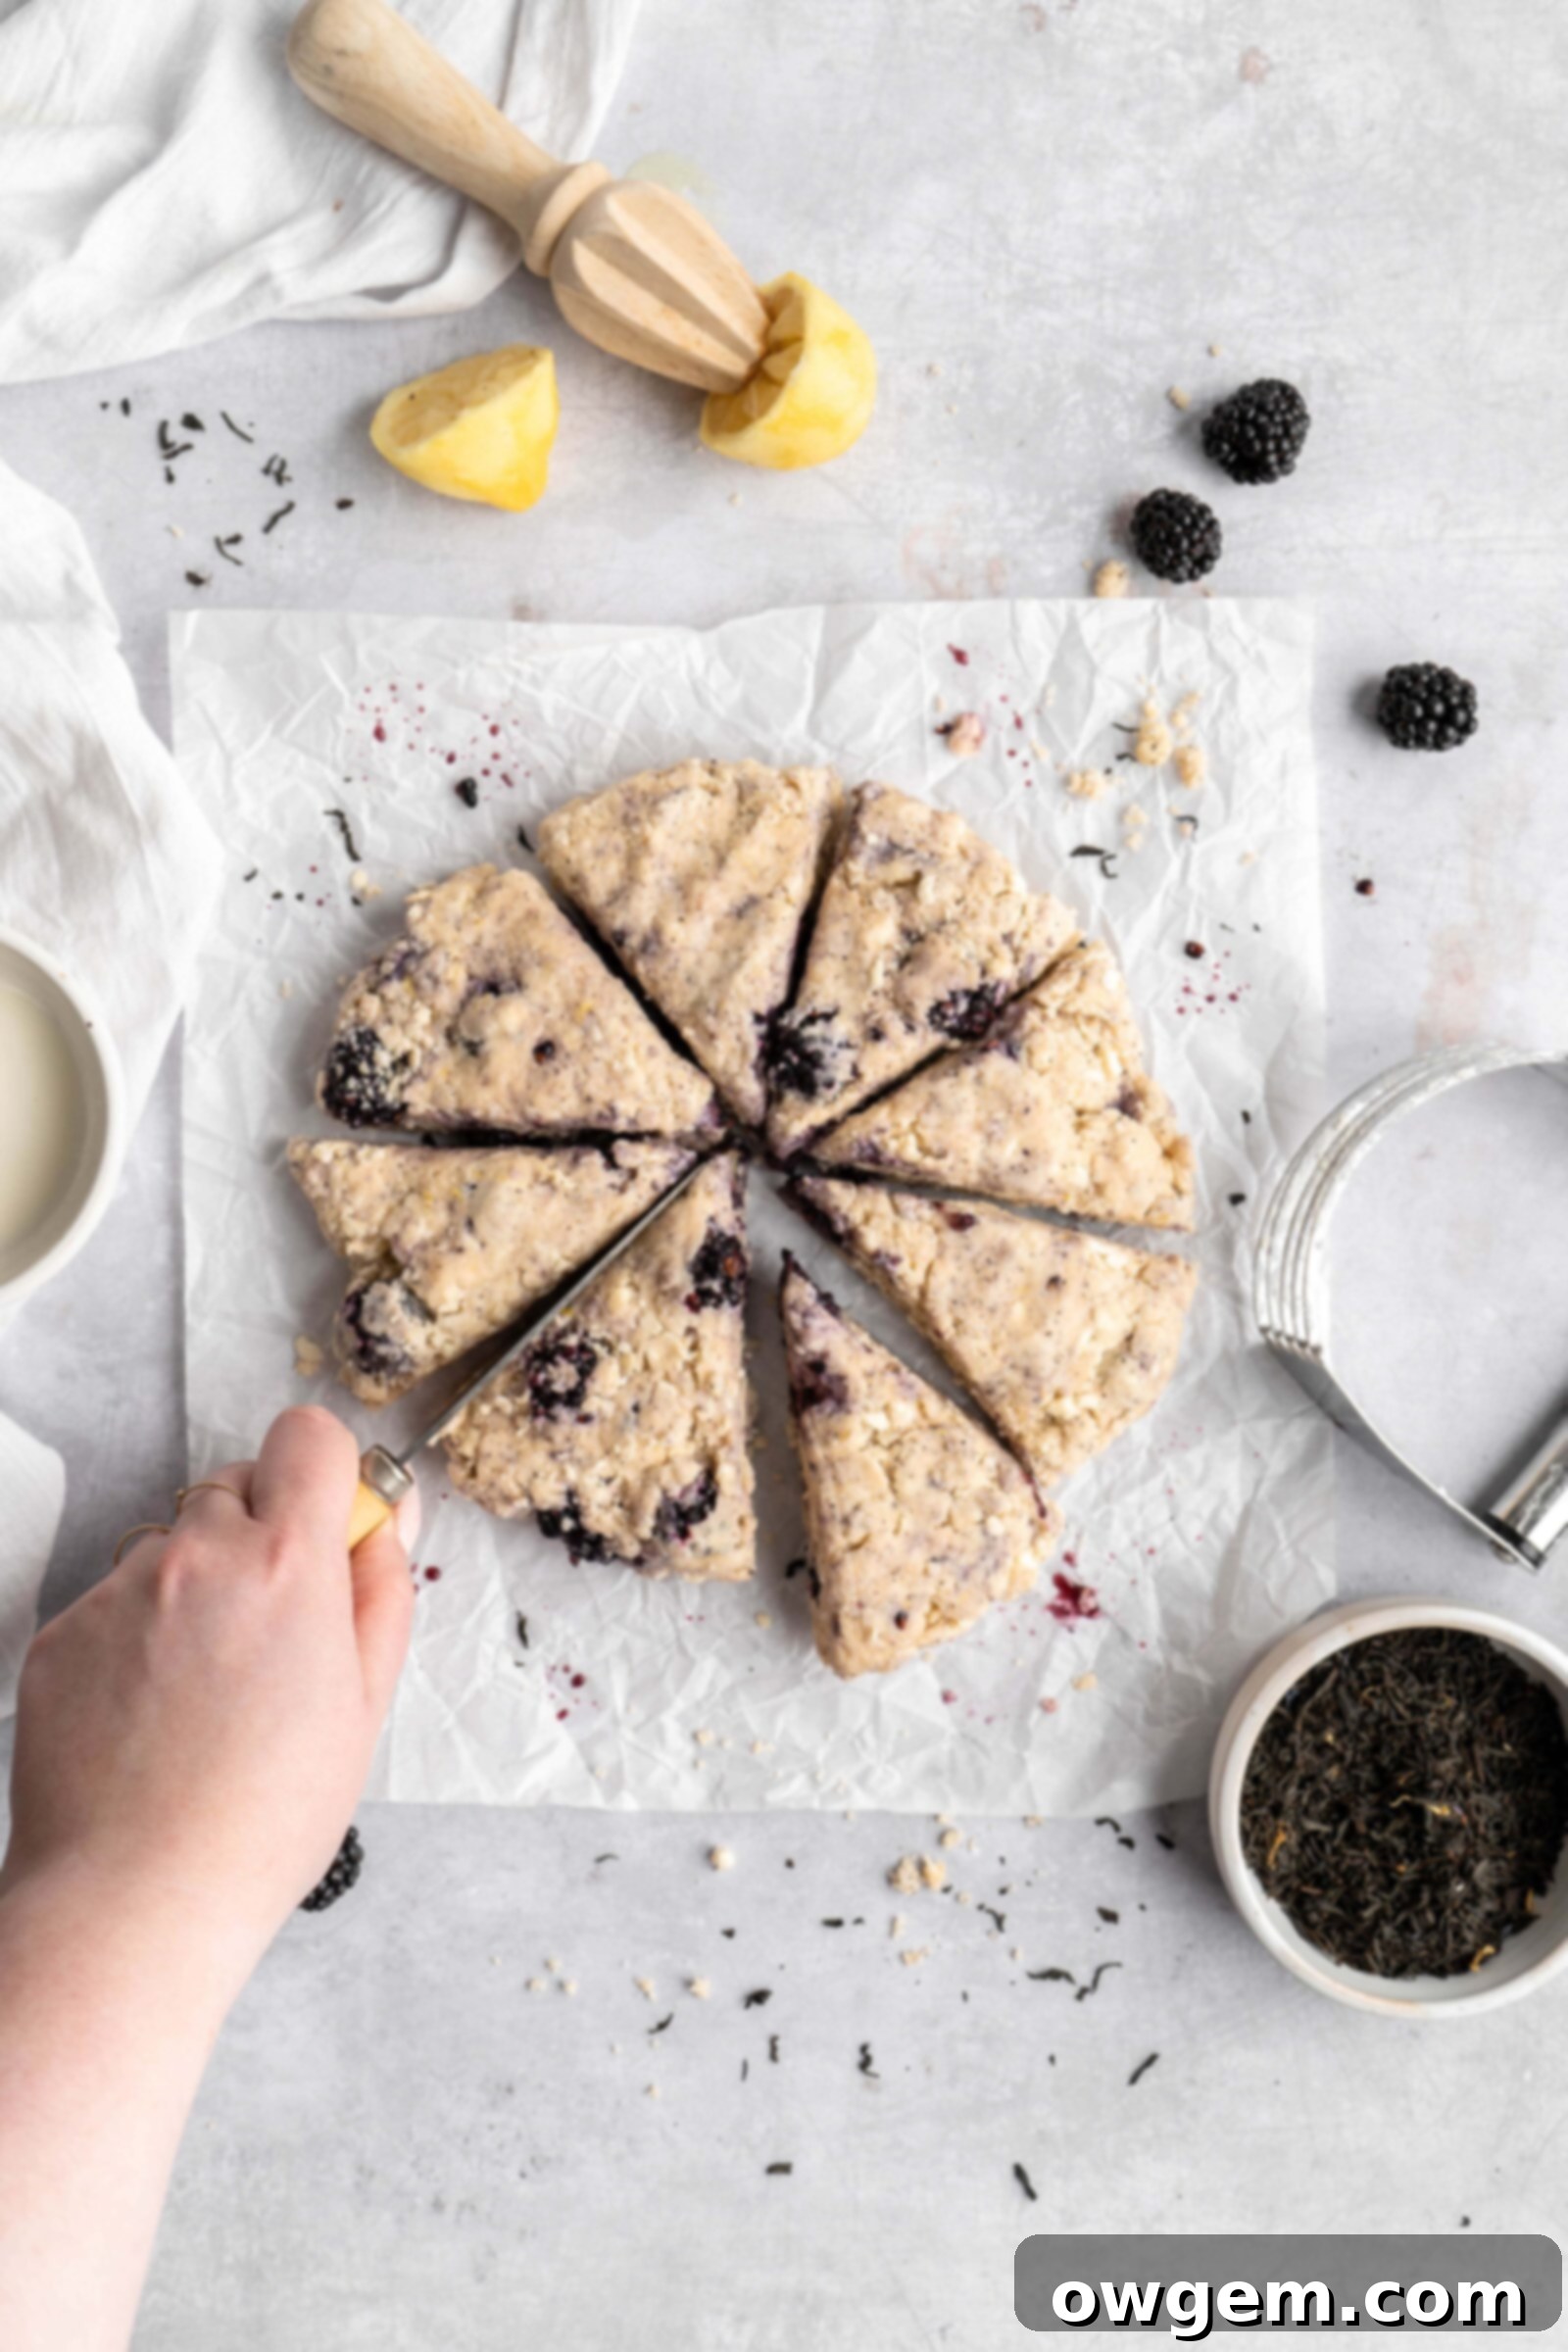
6) Cut and Refrigerate Dough: Using a sharp knife or a bench scraper, cut the disc into 8 equal wedges (like cutting a pizza). Line a baking sheet with parchment paper or a silicone baking mat. Arrange the scone wedges on the prepared baking sheet, ensuring they are spaced apart. Cover the baking sheet loosely with plastic wrap and refrigerate for a minimum of 30 minutes, or up to an hour. This chilling step is vital for the best texture.
7) Bake the Scones: While the scones are chilling, preheat your oven to 400°F (200°C). Once chilled, remove the scones from the fridge, lightly brush the tops with a little extra heavy cream (this helps achieve a golden-brown crust), and immediately transfer them to the preheated oven. Bake for approximately 18-22 minutes, or until the edges are golden brown and the centers are cooked through.
8) Prepare and Glaze: Once baked, remove the scones from the oven and transfer them to a wire rack to cool completely. While they cool, prepare the simple vanilla glaze. Once the scones are fully cooled, drizzle the glaze generously over them. Serve warm or at room temperature.
Expert Tips & Tricks for Perfect Blackberry Earl Grey Scones
Achieving bakery-quality scones is easy with a few key techniques. Keep these tips in mind for consistently delicious results:
- Always Use Cold Butter: This cannot be stressed enough! Cold butter is the secret to flaky scones. As the cold butter melts in the hot oven, it releases steam, creating pockets of air that result in beautifully layered, flaky textures. If your kitchen is warm, consider freezing your butter for 10-15 minutes before cutting it.
- Keep Everything Cold: Not just the butter! Your heavy cream should be chilled, and chilling the cut scone dough before baking is crucial. This helps prevent the butter from melting prematurely and ensures maximum flakiness.
- Don’t Overwork the Dough: Over-mixing, over-kneading, or excessive handling of the dough can lead to tough, dense scones. Overworking develops the gluten too much and warms the butter, both of which are detrimental to the desired light and flaky texture. Mix just until the ingredients are combined and the dough barely comes together.
- Refrigerate the Cut Scones: This step serves two vital purposes. Firstly, it allows the flour more time to fully absorb the liquid, leading to softer scones. Secondly, it ensures the butter re-hardens completely, which is essential for those distinct flaky layers to form during baking. Aim for 30 minutes to an hour of chilling.
- Brush with Extra Cream: A light brush of heavy cream on the tops of the scones before baking helps them achieve a beautiful golden-brown color and a slightly crisp crust. It’s similar to the effect an egg wash has on other baked goods.
- Do Not Overbake: Keep a close eye on your scones, especially towards the end of the baking time. Scones are done when their edges are lightly golden, and they feel firm. Overbaking can dry them out, making them crumbly and less enjoyable.
- Measure Ingredients Accurately: Especially flour. Too much flour can lead to dry, stiff dough. For best results, measure flour by weight using a kitchen scale. If measuring by volume, spoon the flour into your measuring cup and then level it off, rather than scooping directly from the bag.
- Gentle Handling of Blackberries: Blackberries are delicate. Toss them lightly into the flour mixture to coat them, then gently incorporate them into the dough. This helps prevent them from breaking apart too much and staining the dough excessively.

Essential Equipment for Scone Baking
You don’t need a lot of fancy gadgets to make these delicious scones. Here’s a list of the basic equipment you’ll need, along with a few optional but helpful tools:
- Large Mixing Bowl: For combining your dry and wet ingredients.
- Small Saucepan: To heat and steep the Earl Grey tea in the cream.
- Whisk: Essential for thoroughly combining dry ingredients.
- Pastry Cutter (Optional but Recommended): While your fingers work perfectly well, a pastry cutter or “blender” helps to quickly and efficiently cut cold butter into the flour mixture without warming it too much with your hands.
- Measuring Cups and Spoons: For accurate ingredient measurements.
- Kitchen Scale (Highly Recommended): For precise measurement of flour and other dry ingredients by weight, which leads to more consistent results.
- Bench Scraper or Sharp Knife: For easily cutting the dough into wedges. A bench scraper is also useful for gathering and handling the dough.
- Baking Sheet: A sturdy baking sheet to bake your scones on.
- Parchment Paper or Silicone Baking Mat: To line your baking sheet, preventing sticking and making cleanup easier.
- Wire Cooling Rack: For cooling the baked scones completely before glazing.
How to Store Your Delicious Blackberry Earl Grey Scones
To keep your scones fresh and enjoyable, proper storage is key:
- Baked Scones (Room Temperature): Once fully cooled, baked scones can be stored in an airtight container or a Ziploc bag at room temperature for up to 2 days. For best freshness, warm them slightly in the microwave or oven before serving.
- Unbaked Scone Dough (Refrigerator): The cut scone dough can be prepared ahead of time and stored in the refrigerator for up to 1 day. Ensure the dough wedges are well-covered with plastic wrap to prevent them from drying out. Bake directly from the fridge.
- Unbaked Scone Dough (Freezer): For longer storage, unbaked scone dough freezes beautifully. Place the cut scones on a baking sheet, cover with plastic wrap, and freeze until solid (about 1-2 hours). Once frozen, transfer the solid scones to an airtight freezer bag or container. They can be stored for 1-2 months. When ready to bake, you can bake them directly from frozen, adding a few extra minutes to the baking time.

Frequently Asked Questions (FAQ)
Got questions about making these scones? We’ve got answers!
Can these scones be made ahead of time?
Yes, absolutely! The dough can be prepared ahead and stored in the refrigerator for up to 1 day, or frozen for up to 2 months. Refer to the “How to Store These Scones” section for detailed instructions.
What type of Earl Grey tea do you recommend?
I personally use Tazo Earl Grey Tea, which provides a lovely, robust bergamot flavor that shines through in the scones. However, feel free to use your favorite high-quality Earl Grey brand.
My scone dough is too dry, crumbly, and won’t come together. What went wrong?
While the dough should have a shaggy appearance, it should still be able to loosely come together when squeezed. If it’s too dry, you can add more heavy cream, 1 teaspoon at a time, mixing gently until the dough just binds.
My scone dough is too wet and sticky. How can I fix it?
If your dough is too wet, slowly add more flour, about 1 tablespoon at a time, mixing gently until the dough becomes less sticky and more manageable. Be aware that too much additional flour might make the scones a little less flaky, but they will still be delicious.
Can I use a food processor to cut in the butter?
Yes, you can use a food processor to quickly pulse the butter into the flour. However, I often find that using your hands or a pastry cutter is just as easy for this recipe and requires less cleanup, plus it gives you better control over the butter size.
My scones turned out hard and dense. Why?
This is a common issue and is almost always caused by over-handling or over-kneading the dough. Too much manipulation develops the gluten, resulting in a tough texture, and also warms the butter too much, which prevents flakiness.
Can I use loose-leaf Earl Grey tea instead of tea bags?
Yes, absolutely! Loose-leaf tea can provide an even more intense flavor. As a general guide, 1 standard tea bag typically contains about 2 grams of tea leaves. So, if the recipe calls for 4 tea bags, you would use approximately 8 grams of loose-leaf Earl Grey tea.
What can I serve with these scones?
These scones are fantastic on their own, but truly shine with accompaniments. Traditional clotted cream and strawberry jam are classic choices. You can also serve them with honey butter, lemon curd, or simply a fresh cup of coffee or, of course, Earl Grey tea!

Creative Recipe Variations for Your Scones
While these Blackberry Earl Grey Scones are perfect as they are, feel free to get creative and experiment with these delicious variations:
- Blueberry Earl Grey Scones: Easily swap out the fresh blackberries for an equal amount of fresh or frozen blueberries. The combination of blueberries and Earl Grey is equally delightful.
- Plain Earl Grey Scones (No Fruit): If you prefer a simpler, fruit-free scone, simply omit the blackberries entirely. The pure bergamot flavor of the Earl Grey will take center stage, offering a sophisticated and elegant treat.
- Lavender Earl Grey Scones: For an added floral note, incorporate 1-2 teaspoons of culinary dried lavender buds into the dry ingredients. Lavender pairs beautifully with Earl Grey and creates a wonderfully aromatic scone.
- Orange Zest & White Chocolate: Replace the lemon zest with orange zest for a sweeter citrus note. For an extra touch of indulgence, fold in ½ cup of white chocolate chips along with the blackberries.
- Spiced Earl Grey Scones: Add ¼ teaspoon of ground cardamom or a pinch of cinnamon to the dry ingredients for a warm, subtly spiced twist.
- Lemon Glaze: Instead of vanilla, make your glaze with fresh lemon juice for an even brighter citrus punch. Combine confectioners’ sugar with lemon juice until you reach the desired consistency.
More Delightful Baking Inspiration
If you loved these scones, be sure to explore these other fantastic recipes that feature bold flavors and comforting textures:
- Earl Grey Salted Caramel Cupcakes
- Lavender Earl Grey Ice Cream
- Chai Pumpkin Scones
- Carrot Cake Scones with Maple Cream Cheese Glaze

Get the Recipe:
Blackberry Earl Grey Scones
Pin
Rate
Ingredients
Blackberry Earl Grey Scones
- 3/4 cup (172g) Heavy Cream,, plus more if needed
- 4 Earl Grey Teabags,, divided
- 2 ½ cups (300g) All-Purpose Flour
- 1/2 cup (100g) White Sugar
- 2 tsp Baking Powder
- 1/2 tsp Salt
- Zest of 1 Lemon
- 7 tbsp (100g) Cold Unsalted Butter,, cut into small cubes
- 1 ½ tsp Vanilla
- Juice of 1 lemon
- 3/4 cup (115g) Fresh Blackberries
- 1 tbsp Heavy Cream,, for brushing
Vanilla Glaze
- 1 cup (120g) Confectioners Sugar
- 3-4 tbsp Heavy Cream
- 1/2 tsp Vanilla
Instructions
Making the Dough
-
Add cream to a small saucepan over medium heat. Heat until just beginning to bubble. Place 3 earl grey tea bags in, then place into the fridge to steep and cool for 1 hour. After the 1 hour, remove the tea bags, squeezing them to get all the steeped cream out of them, then place the steeped cream back in the fridge for another hour, or until cold.
-
Prepare a large baking sheet with parchment, a silicone baking mat, or simply a light coating of cooking spray. Then, in a large mixing bowl, add flour, sugar, baking powder, salt, lemon zest and contents of 1 teabag. Whisk well to combine. Add in cold butter cubes, and work the butter into flour with your hands or a pastry cutter. Work the butter until it is crumbly and about the size of peas (it is okay if some larger ones remain, just don’t go too small). Add in the blackberries, and toss to disperse and cover in flour.
-
Add lemon juice and vanilla to the steeped cream and stir to combine.
-
Drizzle cream mixture over the bowl, tossing with a fork as you drizzle, until combined into a shaggy dough. After the liquids have been added and mixed, try to form all of the dough together. If the dough does not all come together, and there are crumbs at the bottom of the bowl, then keep adding heavy cream in small increments until the crumbs comes together with the rest of the dough (the dough should still be shaggy looking – too much liquid will activate the gluten, so we don’t want that). When the dough all comes together into shaggy dough it is ready to be turned out onto a well-flour work surface.
Shaping, Cutting, and Resting
-
Pat the dough to get it to form a smooth 6-7” disk, that is about 1” thick (Make sure every once in a while that you are ensuring that the dough isn’t sticking to your work surface). Using a bench scraper or a knife, cut the dough into 8 equal pieces. Then, transfer the wedges, spaced apart, onto the prepared baking sheet, and place into the refrigerator for at least 30 minutes. Preheat the oven to 400°F.
Baking the Scones
-
Remove scones from the fridge, brush the tops with more heavy cream, and place into the preheated oven, and bake for about 18-22 minutes, or until turning golden around the edges. Transfer to a cooling rack and allow to cool completely before glazing.
Vanilla Glaze
-
Add all of the ingredients to a medium mixing bowl, then whisk until smooth and combined. Spoon glaze over cooled scones.
