Irresistible SunButter S’mores Cookies: Your Easy Peanut-Free & Nut-Free Dessert!
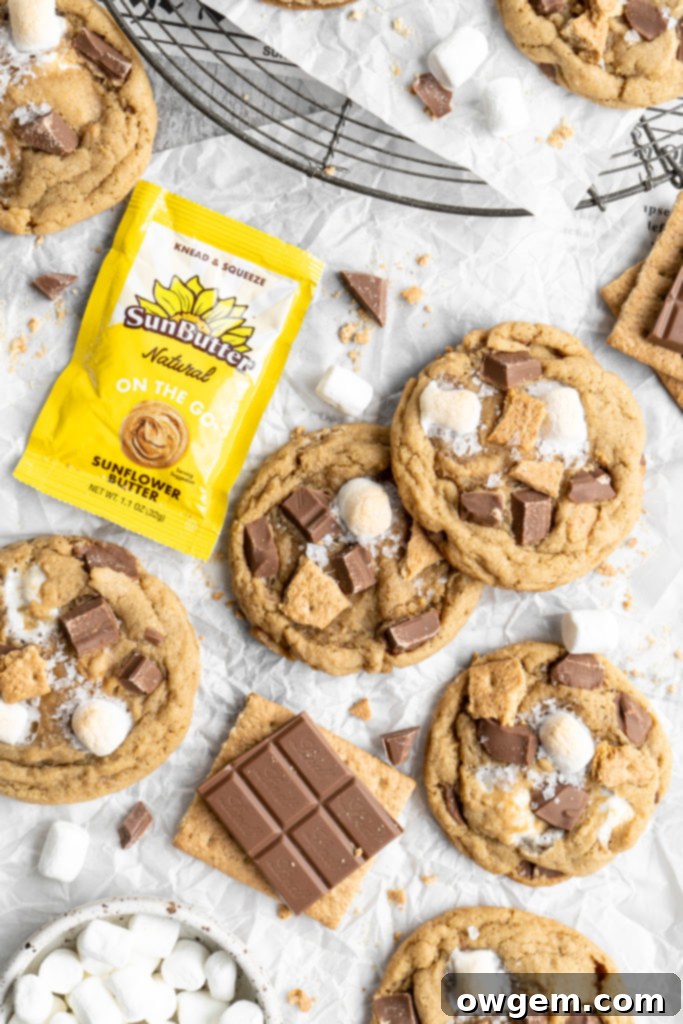
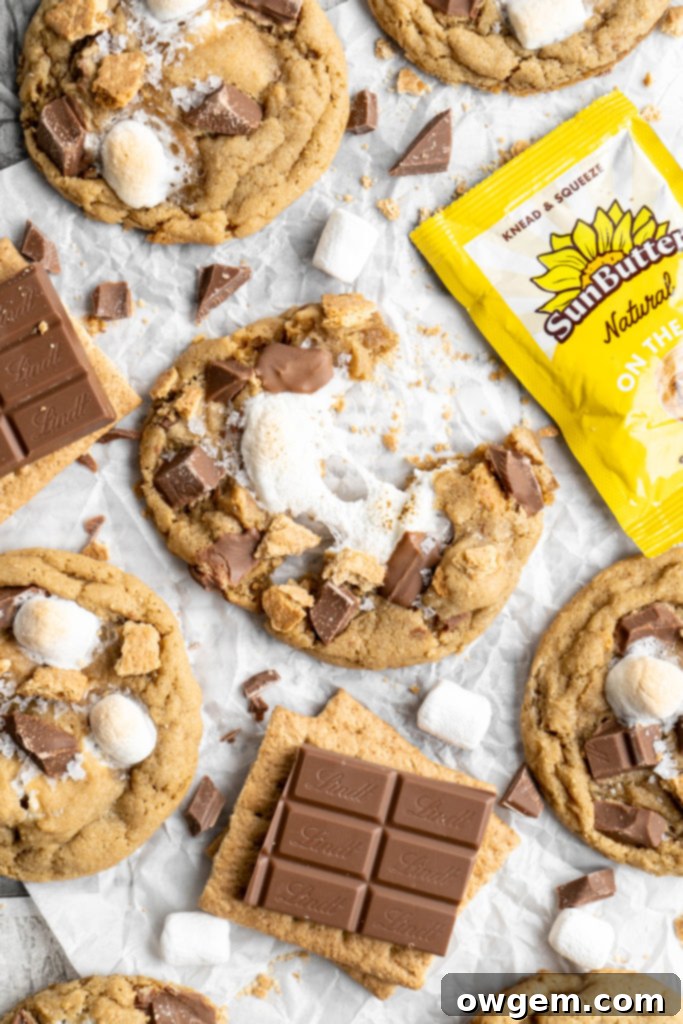
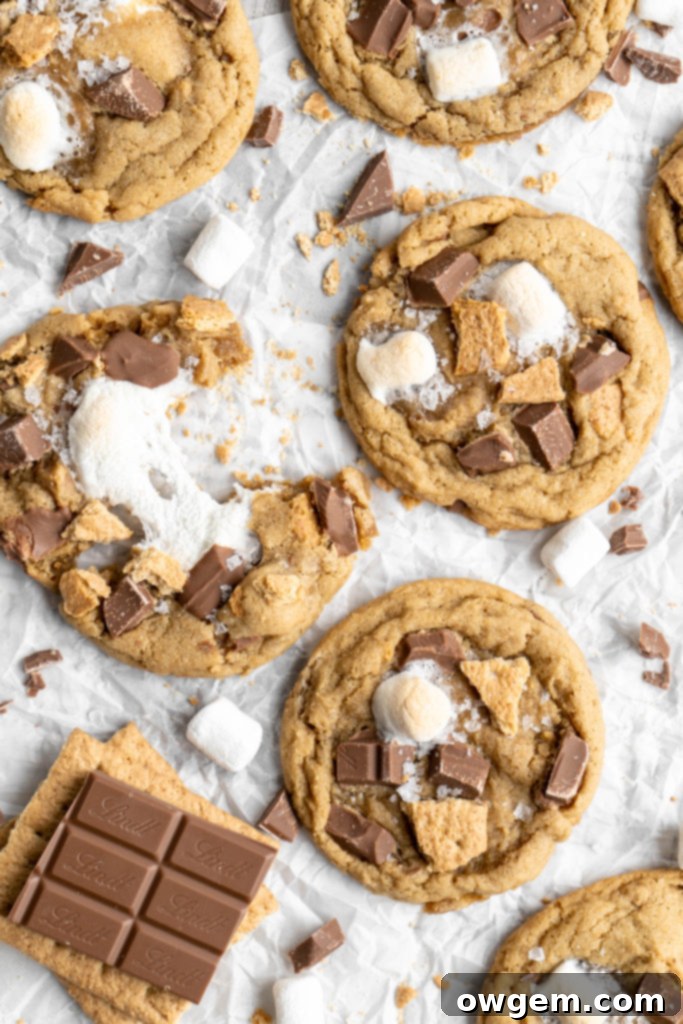
Imagine the cozy warmth of a campfire s’more, transformed into a perfectly soft, chewy cookie. These incredible SunButter S’mores Cookies are an absolute dream come true, especially for those navigating peanut and tree nut allergies. Each bite is a symphony of flavors and textures: rich milk chocolate, delightfully gooey marshmallows, and satisfyingly crunchy graham cracker pieces, all brought together with the unique, slightly nutty flavor of SunButter. Best of all, this recipe is incredibly easy to make, requiring no special equipment—just a bowl, a spoon, and a desire for deliciousness! Prepare to bake a batch of these unforgettable treats that are safe for everyone to enjoy.
What is SunButter? A Delicious & Allergy-Friendly Alternative
For those unfamiliar with this fantastic spread, SunButter is a seed-butter made from roasted sunflower seeds. It’s a remarkable and versatile ingredient, offering an excellent alternative to traditional nut butters like peanut butter or almond butter. This makes it a superhero in the kitchen for anyone dealing with peanut or tree nut allergies, sensitivities, or simply looking to diversify their diet with a healthier, delicious option that doesn’t compromise on flavor.
Beyond its allergy-friendly nature, SunButter boasts an impressive nutritional profile. Each serving delivers 7g of protein, making these cookies not just a treat, but also a source of energy. It’s packed with essential vitamins and minerals, completely free of trans-fats, and often contains less saturated fat than many almond butter varieties. Its distinct, slightly toasted, and subtly sweet flavor lends itself beautifully to both sweet and savory applications, making it a staple for many households. Unlike some nut butter alternatives, SunButter provides a rich, creamy texture and a wholesome taste that stands proudly on its own, adding depth and a unique character to any recipe it’s featured in.
Curious to explore more ways to bake with SunButter? Don’t miss these other delightful recipes from our collection: my SunButter Milk Chocolate Cream Puffs, a decadent SunButter Salted Caramel Cheesecake, and a delightful SunButter Banana Layer Cake. Each offers a unique way to enjoy the incredible taste and benefits of sunflower seed butter, proving its versatility beyond just a spread!
How to Make These Irresistible SunButter S’mores Cookies
Crafting these delightful cookies is a straightforward process, perfect for bakers of all skill levels. With minimal equipment and maximum flavor, you’ll be enjoying warm, gooey s’mores cookies in no time. Follow these simple steps to bring your peanut-free s’mores cookie dreams to life:
- Prepare Dry Ingredients & Oven: First, preheat your oven to 350°F (175°C) and line 3 baking sheets with parchment paper to ensure easy removal and consistent baking. In a medium to large-sized bowl, combine the accurately measured all-purpose flour, baking soda, baking powder, and salt. Whisk these dry ingredients together thoroughly for about 30 seconds to ensure uniform distribution of the leavening agents and salt, then set aside.
- Cream Wet Ingredients: In a separate large mixing bowl, add the melted butter (ensure it’s cooled slightly, not piping hot, to avoid scrambling the eggs), natural SunButter, packed dark brown sugar, and white granulated sugar. Using a hand mixer on medium speed, beat this mixture until it becomes smooth, creamy, and visibly well combined. This usually takes 1-2 minutes. The melted butter contributes significantly to the chewy texture, while the combination of sugars adds a rich, nuanced sweetness.
- Incorporate Eggs and Vanilla: Next, crack in the large eggs, one at a time, beating thoroughly after each addition until just incorporated. Stir in the vanilla extract, which is crucial for enhancing the overall flavor profile of your cookies. Continue to beat until the mixture is fully emulsified, ensuring a cohesive base. Remember to scrape down the sides and bottom of the bowl periodically with a spatula to prevent any unmixed streaks of ingredients.
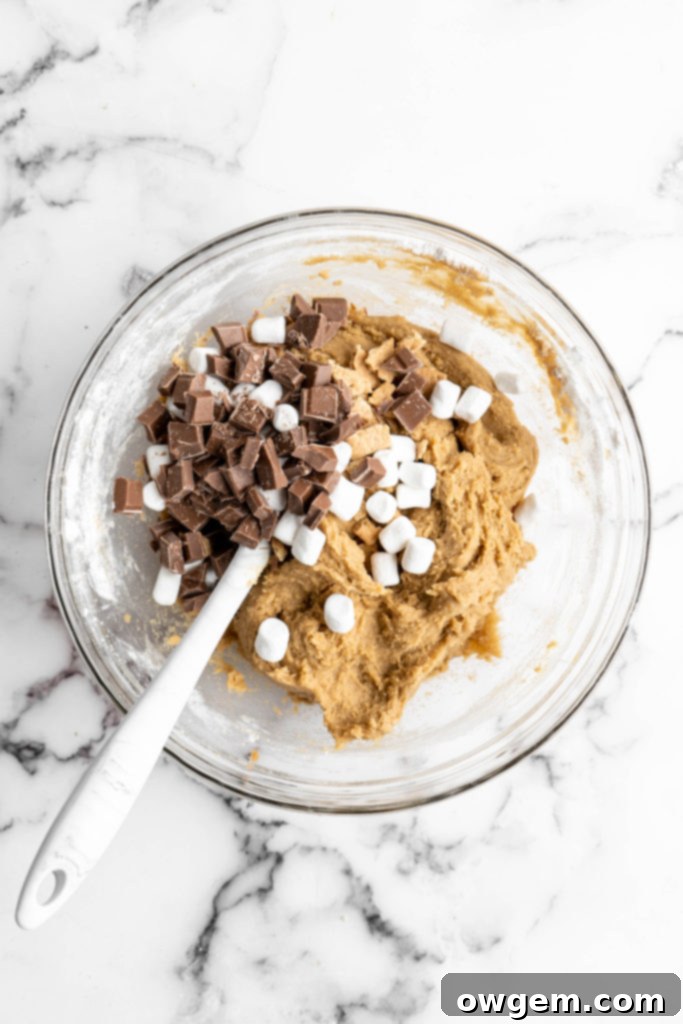
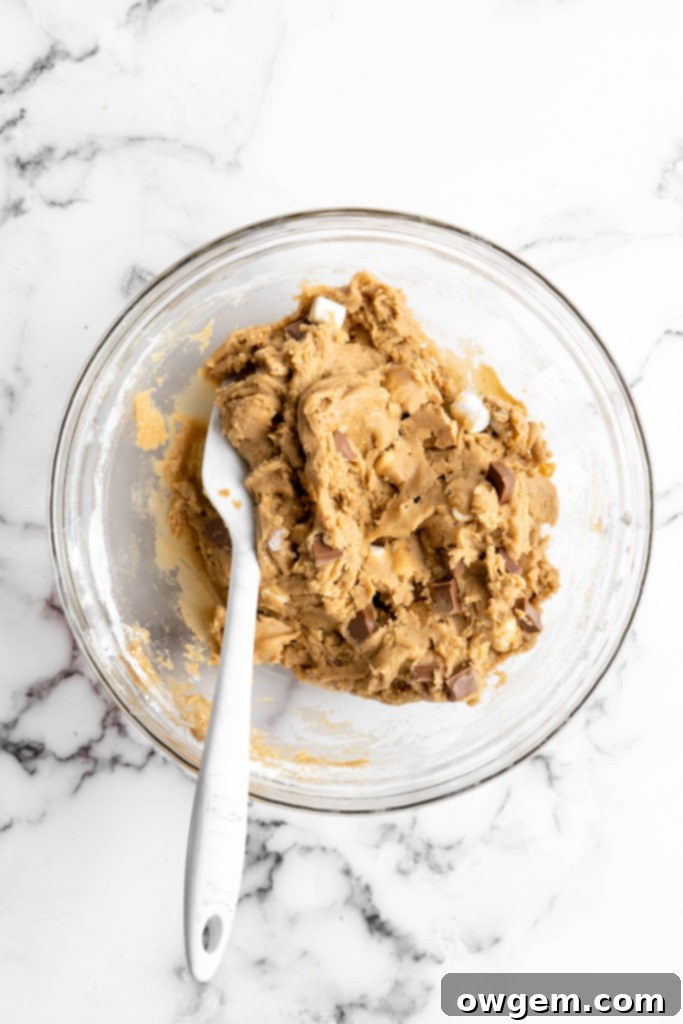
- Combine Wet and Dry & Add Inclusions: Gradually add the whisked flour mixture to the wet ingredients. Mix on the lowest speed possible until just combined. It’s critical to mix only until no dry streaks of flour remain; overmixing at this stage will develop gluten, which can lead to tough, dense cookies rather than the desired soft and chewy texture. Finally, add the roughly chopped milk chocolate (or chocolate chips), mini marshmallows, and chopped graham crackers. Use a sturdy spatula to gently fold these delicious s’mores components into the dough until they are well dispersed throughout, ensuring every cookie gets a generous share.
- Scoop, Chill (Optional), and Bake: Using a cookie scoop (approximately 2 tablespoons in size) or your hands, scoop uniform portions of cookie dough and roll them into neat balls. This ensures even baking and a professional appearance. For a thicker, chewier cookie, I highly recommend arranging the scooped cookie dough balls on a separate parchment-lined tray and placing them into the fridge to cool for 30-60 minutes. This chilling step allows the butter to re-solidify, preventing excessive spreading during baking and resulting in a more robust cookie. Once chilled (or immediately, if you prefer thinner, crispier cookies), arrange the dough balls evenly onto your prepared baking sheets, leaving enough space between each (I typically place 6 cookies per standard sheet). Place the baking sheets into the preheated oven and bake for 11-12 minutes, or until the edges are golden brown and the centers are still slightly soft and puffy. Remove from the oven and let them cool on the baking sheets for a few minutes before transferring them to a wire rack to cool completely. This cooling period on the hot sheet continues the baking process gently and prevents the cookies from falling apart.
The Curious Case of Green Cookies: SunButter and Baking Soda Explained
Don’t be alarmed if you notice a slightly green hue on the inside of your SunButter S’mores Cookies after baking! This is a completely normal and harmless chemical reaction that many bakers encounter when using sunflower seed products. It occurs when the chlorogenic acid, a natural antioxidant found abundantly in sunflower seeds (and thus in SunButter), interacts with baking soda (sodium bicarbonate) during the baking process. The alkalinity of the baking soda, combined with the heat of the oven, causes the chlorogenic acid to oxidize, resulting in a distinct green discoloration.
While it might look a little unusual, especially if you’re not expecting it and are used to traditional cookie colors, rest assured that this green color has absolutely no impact on the taste, texture, or safety of your delicious cookies. They are perfectly edible and just as delightful. It’s simply a fun scientific quirk of using this wonderful allergy-friendly ingredient in your baking, much like how some blueberries can turn green in muffins. So, embrace the unique charm of your slightly green-tinted, allergy-friendly treats!
To Chill or Not to Chill: The Science of Cookie Refrigeration
The decision to refrigerate your cookie dough before baking is entirely up to personal preference, but it significantly impacts the final texture of your SunButter S’mores Cookies. Chilling the dough, typically for 30-60 minutes, allows the butter to solidify. This prevents the cookies from spreading too rapidly in the oven, as the butter takes longer to melt, resulting in a thicker, chewier cookie with a more concentrated flavor and delightfully crisp edges. Additionally, chilling allows the flour to fully hydrate and the flavors to meld, often leading to a richer, more complex taste profile.
If you’re a fan of thinner, crispier cookies with a slightly wider spread, feel free to skip the chilling step and bake them immediately after scooping. You’ll still get a delicious cookie, just with a different textural outcome. However, for that ultimate bakery-style, thick, and wonderfully chewy texture that truly cradles all those gooey s’mores fillings – the melted chocolate, soft marshmallows, and crunchy graham crackers – I highly recommend that brief stint in the fridge. It’s a small, easy step that yields a noticeable and delightful difference in your baked goods, elevating them to perfection.
Precision Baking: Why Measuring Flour Correctly is Crucial
Achieving the perfect texture in your SunButter S’mores Cookies, or any baked good, hinges significantly on measuring your flour accurately. Flour is a foundational ingredient, and its quantity directly impacts the cookie’s structure, spread, and tenderness. Too much flour can lead to cookies that are tough, dry, and crumbly, lacking that desirable soft and chewy quality. Conversely, too little flour will result in cookies that spread excessively thin, have no structural integrity, and can be greasy or overly delicate.
The most precise and recommended method for measuring flour in baking is by weight, using a reliable kitchen scale. Volumetric measurements (using measuring cups) are notoriously inconsistent and can often over-measure flour by a significant amount – sometimes up to 100%! This means you could inadvertently be adding double the required flour, leading to a vastly different and disappointing cookie. By weighing your flour (the recipe specifies 300g for 2½ cups), you eliminate these inconsistencies, guaranteeing that your cookies will be consistently perfectly chewy, tender, and structured, *every single time*. This precision is a baker’s secret weapon for repeatable success.
If you don’t own a kitchen scale, you can still significantly improve the accuracy of volumetric measurements by using the “spoon and level” method. Instead of scooping flour directly from the bag with your measuring cup (which compacts the flour and adds too much), first use a spoon to lightly fluff the flour in its container. Then, gently spoon the fluffed flour into your measuring cup until it’s overflowing. Finally, use a straight edge (like the back of a knife or a flat ruler) to level off the excess flour, sweeping it away. It’s crucial not to pack the flour into the cup, nor should you scoop directly with the measuring cup straight from the bag or container, as both actions will compact the flour, leading to an inaccurate and excessive amount.
Frequently Asked Questions About SunButter S’mores Cookies
You absolutely do not have to stick to chopped chocolate! While roughly chopped chocolate from a bar creates beautiful, rustic pools of melted chocolate throughout the cookie, standard chocolate chips work wonderfully too and are often more convenient. Feel free to use any type of chocolate you prefer – milk chocolate for classic s’mores sweetness, semi-sweet for a balanced flavor, or even dark chocolate for a richer, more intense profile. You can even mix and match for extra complexity!
Yes, while these cookies are specifically designed to be peanut and nut-free with SunButter, you can certainly substitute it with an equal amount of peanut butter or any other preferred nut butter if allergies are not a concern in your household. The overall texture and flavor profile will shift slightly depending on the butter you choose, as each has its unique characteristics, but the recipe structure remains robust enough to accommodate these changes. Just be aware that using nut butters will, of course, remove the allergy-friendly (peanut/tree nut free) aspect of the original recipe.
As discussed earlier, refrigerating the dough is an optional but highly recommended step that significantly influences the final texture of your cookies. If you prefer a thicker, chewier cookie with less spread and a richer flavor, I strongly advise chilling the dough for 30-60 minutes. This allows the fats to firm up and the flavors to develop. However, if your preference leans towards a thinner, slightly crispier cookie, you can absolutely bake them immediately after scooping without refrigeration. Both methods yield delicious results, just with distinct textural outcomes.
For that professional, bakery-style perfectly round cookie appearance, here’s a simple trick: immediately after removing the cookies from the oven, while they are still hot and pliable, use a round cookie cutter (or even a glass or mug) that is slightly larger than your baked cookies. Place it over each cookie and gently scoot the cookie around inside the cutter in a circular motion. This will nudge the warm edges into a perfectly circular shape. This technique works best when the cookies are fresh out of the oven and still soft.
Absolutely! Both the unbaked cookie dough and the fully baked cookies freeze exceptionally well, making them perfect for meal prep or enjoying a fresh cookie anytime. To freeze dough, scoop individual portions and place them on a parchment-lined baking sheet to flash freeze for about an hour until solid. Then transfer the frozen dough balls to an airtight freezer bag or container for up to 2-3 months. Bake from frozen, adding a couple of minutes (2-4 minutes) to the baking time. For baked cookies, ensure they are completely cooled before placing them in an airtight container or freezer bag. They can be stored in the freezer for up to 3 months. Thaw at room temperature, or warm briefly in the oven or microwave for that fresh-baked feel.
Yes, preparing the cookie dough in advance is a fantastic time-saver, especially when entertaining or wanting fresh cookies on demand! You can make the cookie dough 1-2 days ahead of time. Once prepared, cover the bowl tightly with plastic wrap or transfer the dough to an airtight container and store it in the refrigerator. This not only makes baking day easier but also allows the flavors to meld and deepen, often resulting in an even more delicious and complex cookie. When ready to bake, simply scoop and proceed with the recipe, keeping in mind that chilled dough might need a minute or two extra baking time due to its colder temperature.

Get the Recipe:
Easy SunButter S’mores Cookies with Graham Crackers
Pin
Rate
Ingredients
- 2½ cups (300g) All-Purpose Flour, measured correctly (see tips above for weighing or spoon & level method)
- ¾ tsp Baking Soda
- ¾ tsp Baking Powder
- 1 tsp Salt
- ½ cup (114g) Unsalted Butter, melted and slightly cooled
- ½ cup (120g) Natural SunButter, creamy style recommended for best texture
- ¾ cup (165g) Dark Brown Sugar, packed, for chewiness and depth of flavor
- ¾ cup (150g) White Granulated Sugar
- 2 Large Eggs, at room temperature for better emulsification
- 1 tsp Vanilla Extract, pure vanilla extract for best flavor
- 1 cup (200g) Roughly Chopped Milk Chocolate, (or quality milk chocolate chips, semi-sweet or dark chocolate also work)
- ½ cup (30g) Mini Marshmallows, regular size marshmallows can be chopped if mini are unavailable
- ½ cup (45g) Roughly Chopped Graham Crackers, creates that authentic s’mores crunch
Instructions
-
Preheat your oven to 350°F (175°C). Line 3 baking sheets with parchment paper to prevent sticking and ensure even baking. In a medium to large-sized bowl, add in accurately measured all-purpose flour, baking soda, baking powder and salt. Whisk these dry ingredients together thoroughly for about 30 seconds to ensure uniform distribution, then set aside.
-
In a separate large mixing bowl, add the melted butter (ensure it’s not piping hot, just warm), natural SunButter, packed dark brown sugar, and white granulated sugar. Using a hand mixer on medium speed, beat the mixture until it becomes smooth, creamy, and well combined, usually taking 1-2 minutes. Scrape down the sides of the bowl to ensure everything is incorporated.
-
Add the large eggs one at a time, beating well after each addition until just incorporated. Then, stir in the vanilla extract. Continue to beat until the mixture is fully emulsified, making sure to scrape down the sides and bottom of the bowl periodically with a spatula to prevent any unmixed streaks. Gradually add the whisked flour mixture to the wet ingredients, mixing on the lowest speed possible until just combined. Mix only until no dry streaks of flour remain; do not overmix. Finally, add the roughly chopped milk chocolate, mini marshmallows, and chopped graham crackers. Use a sturdy spatula to gently fold these delicious s’mores components into the dough until they are well dispersed throughout.
-
Using a cookie scoop (approximately 2 tablespoons in size) or your hands, scoop uniform portions of cookie dough and roll them into neat balls. This ensures even baking.
-
For those who prefer a thicker, chewier cookie with minimal spreading, arrange the scooped cookie dough balls on a separate parchment-lined tray and place them into the fridge to cool for 30-60 minutes. This chilling step is optional but highly recommended for optimal texture.
-
Arrange the chilled (or unchilled) cookie dough balls evenly onto your prepared baking sheets, leaving enough space between each (I typically place 6 cookies per standard sheet). Place the baking sheets into the preheated oven and bake for 11-12 minutes, or until the edges are golden brown and the centers are still slightly soft and puffy. Remove from the oven and let them cool on the baking sheets for a few minutes before transferring them to a wire rack to cool completely.
Tips for the Best SunButter S’mores Cookies
To ensure your SunButter S’mores Cookies turn out perfectly chewy and utterly delicious every time, keep these expert tips in mind:
- Room Temperature Eggs: Always use room temperature eggs for baking. Eggs at room temperature incorporate more evenly into the batter, creating a smoother, more uniform dough, which ultimately leads to a better rise and texture in your finished cookies.
- Quality Ingredients: While this is a simple recipe, the quality of your ingredients truly matters. Opt for a good quality milk chocolate bar that you can chop yourself (it melts into luscious pools better than chips), fresh, soft marshmallows, and crisp graham crackers. These components will elevate your cookies from merely good to absolutely extraordinary.
- Don’t Overmix: This is a crucial rule for many cookie recipes. Once you add the dry ingredients to the wet, mix only until just combined and no streaks of flour remain. Overmixing develops gluten in the flour, which can make your cookies tough, dense, and less enjoyable, rather than the desired soft and chewy texture.
- Even Scoops: For uniform baking and a professional appearance, use a cookie scoop (approximately 2 tablespoons in size) to portion out your dough. This ensures all your cookies are the same size, leading to even baking and preventing some cookies from being over or under-baked.
- Freshness is Key: While these cookies are delicious anytime, they are truly at their peak when enjoyed fresh out of the oven. At this stage, the chocolate is wonderfully melty, and the marshmallows are delightfully gooey and slightly toasted. They remain delicious for several days when stored properly, but that warm, fresh experience is unmatched.
Storage Instructions for Your Delicious Cookies
To keep your SunButter S’mores Cookies tasting fresh and delightful for as long as possible, proper storage is key. Whether you’ve baked a big batch or want to prepare dough in advance, here’s how to store them:
- Room Temperature (Baked Cookies): Once completely cooled, store the baked cookies in an airtight container at room temperature. They will remain wonderfully fresh and chewy for up to 3-4 days. For an extra tip to keep them soft, you can place a slice of plain white bread or a tortilla in the container; the cookies will absorb moisture from the bread, keeping them tender.
- Freezing Baked Cookies: For longer storage, cooled, baked cookies can be frozen. Place them in a single layer on a baking sheet to flash freeze for about an hour until solid. Then transfer them to an airtight freezer-safe bag or container. They can be stored in the freezer for up to 3 months without losing quality. To enjoy, simply thaw at room temperature for an hour or two, or warm briefly in a microwave (10-15 seconds) or a low oven (300°F/150°C for 5-7 minutes) until soft and gooey again.
- Freezing Cookie Dough: You can also freeze the unbaked cookie dough! Scoop the dough into individual balls and place them on a parchment-lined baking sheet. Flash freeze for about an hour until solid. Once firm, transfer the frozen dough balls to an airtight freezer bag or container. They can be stored in the freezer for up to 2-3 months. When ready to bake, place the frozen dough balls on a prepared baking sheet and bake as directed in the recipe, adding an extra 2-3 minutes to the total baking time since they are starting from a frozen state.
Why These SunButter S’mores Cookies are a Must-Try!
These SunButter S’mores Cookies aren’t just a recipe; they’re an experience! They bring the beloved, nostalgic flavors of a classic s’more right into your kitchen, without the need for a campfire, and most importantly, without any peanuts or tree nuts. This makes them a perfect, worry-free treat for school lunchboxes, birthday parties, potlucks, or just a cozy evening at home with loved ones. The rich, chewy texture combined with the delightful bursts of melted milk chocolate, sticky, slightly toasted marshmallows, and satisfyingly crunchy graham cracker pieces creates a dessert that’s truly unforgettable and universally appealing. So gather your ingredients, follow these simple steps, and prepare to indulge in some of the most satisfyingly delicious, allergy-friendly cookies you’ll ever bake. They’re guaranteed to become a new family favorite!
